提交工单
咨询集成、功能及报价等问题
)
If you don't know how to create a project and obtain an app ID, please refer to this guide.
podfile: pod initPodfile file to add the basic dependencies:pod 'ZegoUIKitPrebuiltCall'
pod 'ZegoUIKitSignalingPlugin'pod installCall the init method on the App startup, and specify the userID and userName for connecting the Call Kit service.
class ViewController: UIViewController {
    override func viewDidLoad() {
        super.viewDidLoad()
        // Get your AppID and AppSign from ZEGOCLOUD's Console
        // userID can only contain numbers, letters, and '_'.
        let config = ZegoUIKitPrebuiltCallInvitationConfig(notifyWhenAppRunningInBackgroundOrQuit: true, isSandboxEnvironment: false)
        ZegoUIKitPrebuiltCallInvitationService.shared.initWithAppID(YOUR_APPID, appSign: YOUR_APP_SIGN, userID:YOUR_USER_ID, userName:YOUR_USER_NAME, config: config)
    }
}| Parameter | Type | Required | Description |
|---|---|---|---|
incomingCallRingtone |
String |
No |
This parameter has been deprecated. |
outgoingCallRingtone |
String |
No |
If you want to set the call ringtone for receiving incoming call invitations or sending outgoing call invitations, you can use the incomingCallRingtone and outgoingCallRingtone. |
notifyWhenAppRunningInBackgroundOrQuit |
Bool |
No |
Change notifyWhenAppRunningInBackgroundOrQuit to false if you don't need to receive a call invitation notification while your app running in the background or quit. |
isSandboxEnvironment |
Bool |
No |
To publish your app to TestFlight or App Store, set the isSandboxEnvironment to false before starting building. To debug locally, set it to true. Ignore this when the notifyWhenAppRunningInBackgroundOrQuit is false. |
certificateIndex |
Enum |
No |
To configure different certificates for different bunldle ID applications. The certificateIndex can be set as firstCertificate or secondCertificate, defaults to firstCertificate. |
showDeclineButton |
Bool |
No |
This parameter has been deprecated. |
innerText |
ZegoInnerText |
No |
To modify the UI text, use this property. For more details, see Custom prebuilt UI. |
| Parameter | Type | Required | Description |
|---|---|---|---|
appID |
String |
Yes |
The App ID you get from ZEGOCLOUD Admin Console. |
appSign |
String |
Yes |
The App Sign you get from ZEGOCLOUD Admin Console. |
userID |
String |
Yes |
userID can be something like a phone number or the user ID on your own user system. userID can only contain numbers, letters, and underlines (_). |
userName |
String |
Yes |
userName can be any character or the user name on your own user system. |
config |
ZegoUIKitPrebuiltCallInvitationConfig |
Yes |
This can be used to set up call invitation related configurations. |
You can customize the position of the ZegoSendCallInvitationButton accordingly, pass in the ID of the user you want to call.
class ViewController: UIViewController {
    override func viewDidLoad() {
        super.viewDidLoad()

        // Create Voice Call invitation Button
        let callTargetUser: ZegoUIKitUser = ZegoUIKitUser.init("TargetUserID", "TargetUserName")
        let sendVoiceCallButton: ZegoSendCallInvitationButton = ZegoSendCallInvitationButton(ZegoInvitationType.voiceCall.rawValue)
        sendVoiceCallButton.text = "voice"
        sendVoiceCallButton.setTitleColor(UIColor.blue, for: .normal)
        sendVoiceCallButton.inviteeList.append(callTargetUser)
        sendVoiceCallButton.resourceID = "zegouikit_call" // For offline call notification
        sendVoiceCallButton.frame = CGRect.init(x: 100, y: 100, width: 150, height: 40)
        // Add the button to your view
        self.view.addSubview(sendVoiceCallButton)
    }
}class ViewController: UIViewController {
override func viewDidLoad() {
super.viewDidLoad()
// Create Video Call invitation Button
let callTargetUser: ZegoUIKitUser = ZegoUIKitUser.init("TargetUserID", "TargetUserName")
let sendVideoCallButton: ZegoSendCallInvitationButton = ZegoSendCallInvitationButton(ZegoInvitationType.videoCall.rawValue)
sendVideoCallButton.text = "Video"
sendVideoCallButton.setTitleColor(UIColor.blue, for: .normal)
sendVideoCallButton.inviteeList.append(callTargetUser)
sendVideoCallButton.resourceID = "zegouikit_call" // For offline call notification
sendVideoCallButton.frame = CGRect.init(x: 100, y: 100, width: 150, height: 40)
// Add the button to your view.
self.view.addSubview(sendVideoCallButton)
}
}| Parameter | Type | Required | Description |
|---|---|---|---|
inviteeList |
Array |
Yes |
The information of the callee. userID and userName are required. For example: [{ userID: inviteeID, userName: inviteeName }] |
type |
int |
Yes |
If the type is set to ZegoInvitationType.videoCall.rawValue, a video call is made when the button is pressed. If the type is set to other values, a voice call is made. |
resourceID |
String |
No |
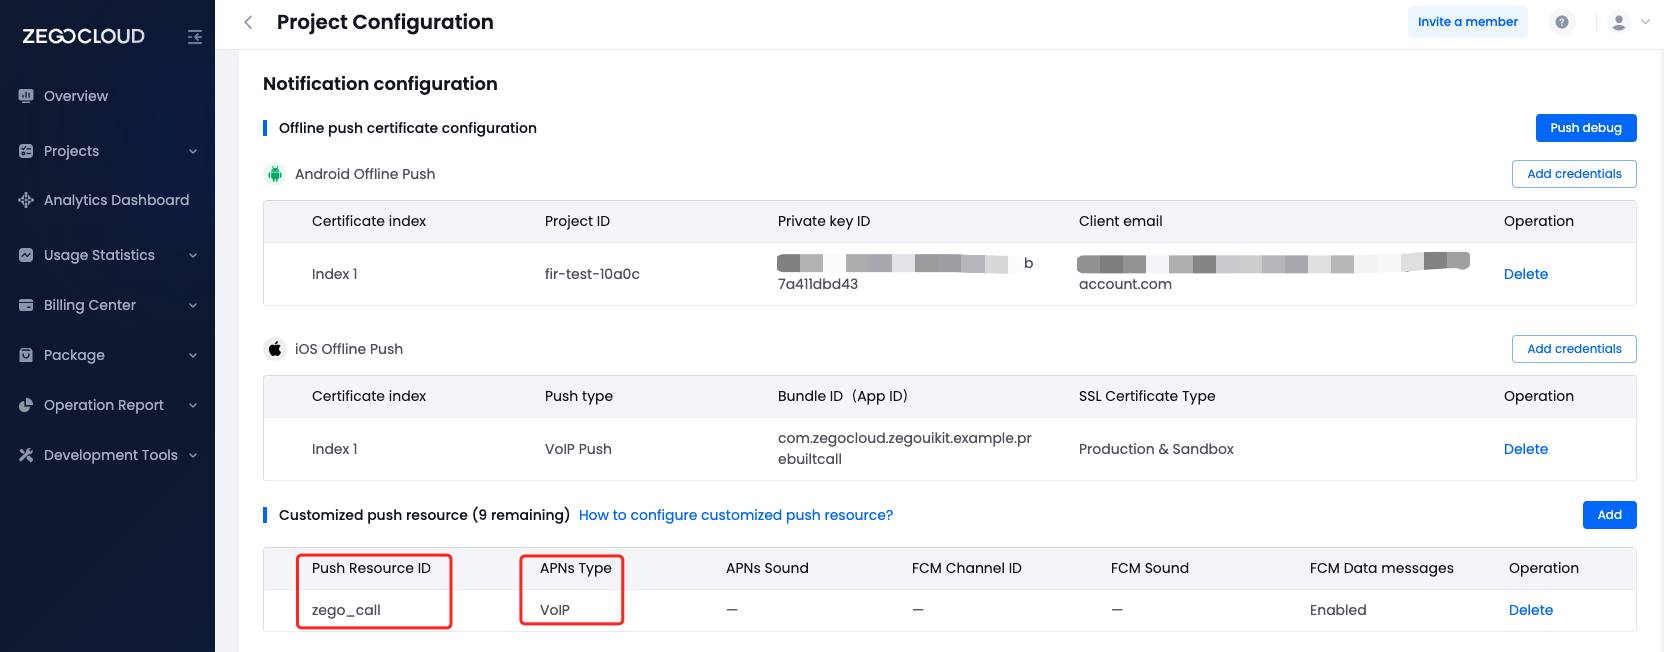
resourceID can be used to specify the ringtone of an offline call invitation, which must be set to the same value as the Push Resource ID in ZEGOCLOUD Admin Console. This only takes effect when the notifyWhenAppRunningInBackgroundOrQuit is true. |
timeout |
UInt32 |
No |
The timeout duration. It's 60 seconds by default. |
For more parameters, go to Custom prebuilt UI.
Now, you can make call invitations by simply clicking on the buttons you set.
In the create resource ID popup dialog, you should switch to the VoIP option for APNs, and switch to Data messages for FCM.
When you have completed the configuration, you will obtain the resourceID. You can refer to the image below for comparison.
)
Open the my_project/ios/my_project/Info.plist file and add the following:
)
<key>NSCameraUsageDescription</key>
<string>We need to use the camera</string>
<key>NSMicrophoneUsageDescription</key>
<string>We need to use the microphone</string>AppDelegate.swift file, implement Apple's register callback for receiving the deviceToken:func application(_ application: UIApplication, didRegisterForRemoteNotificationsWithDeviceToken deviceToken: Data){
}didRegisterForRemoteNotificationsWithDeviceToken callback, call the setRemoteNotificationsDeviceToken method to get the deviceToken:import ZegoUIKitPrebuiltCall
func application(_ application: UIApplication, didRegisterForRemoteNotificationsWithDeviceToken deviceToken: Data) {
/// Required - Set the device token
ZegoUIKitPrebuiltCallInvitationService.setRemoteNotificationsDeviceToken(deviceToken)
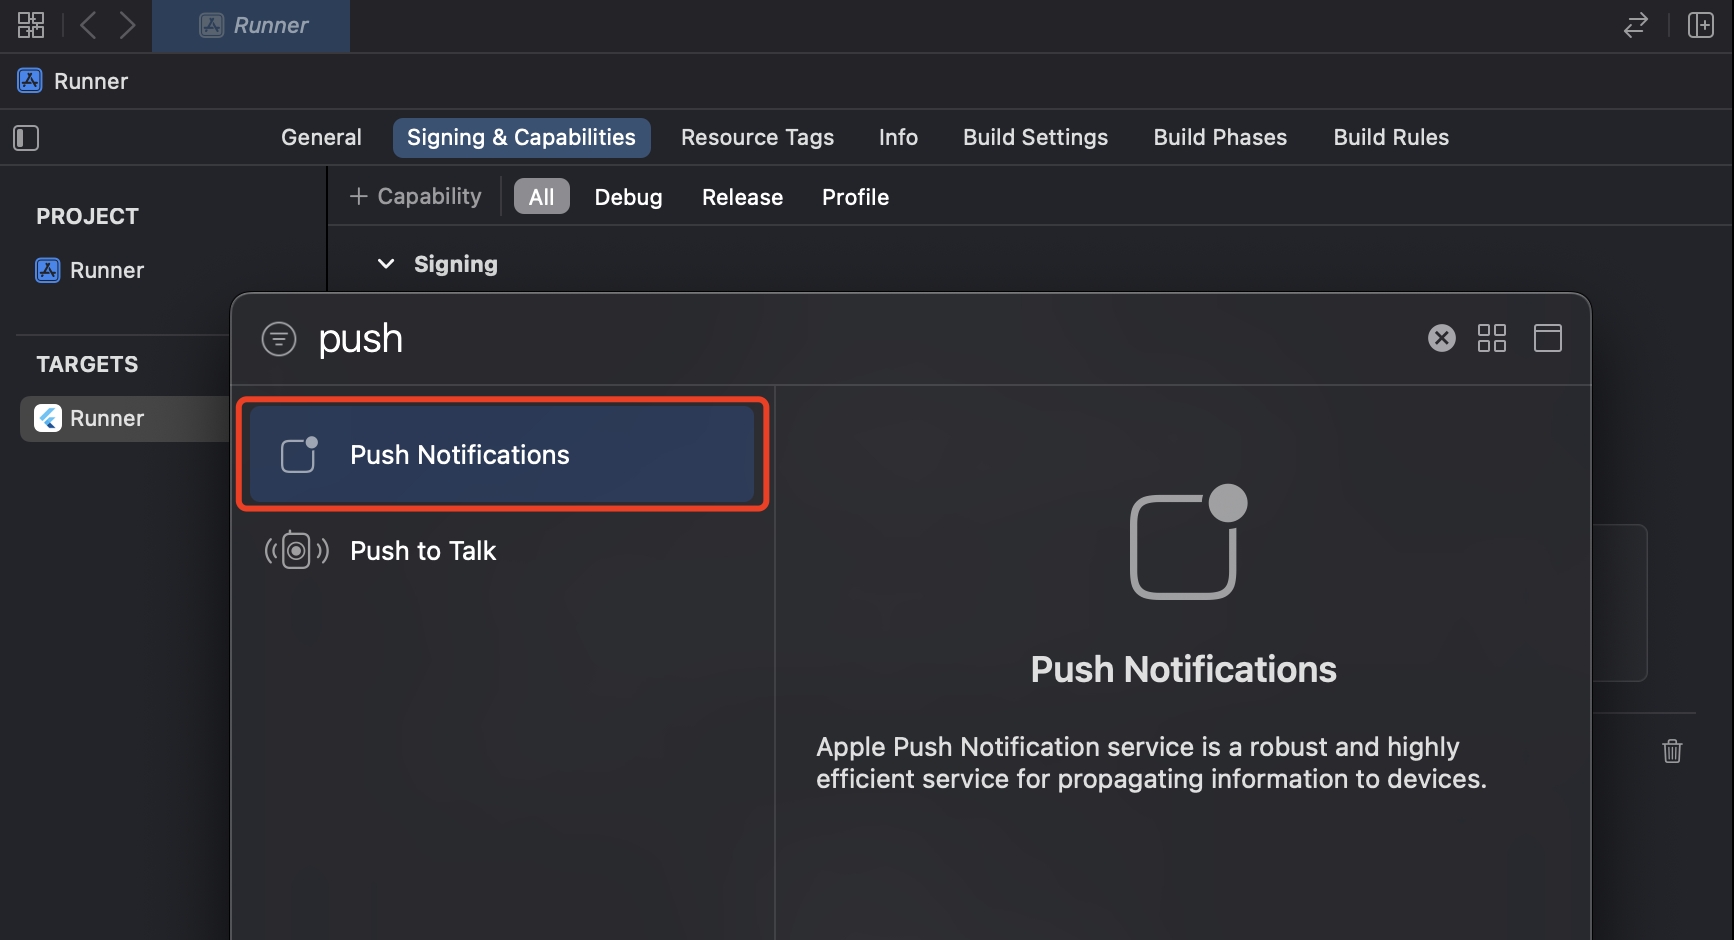
}Open the project with Xcode, and click the+ Capability on the Signing & Capabilities page.
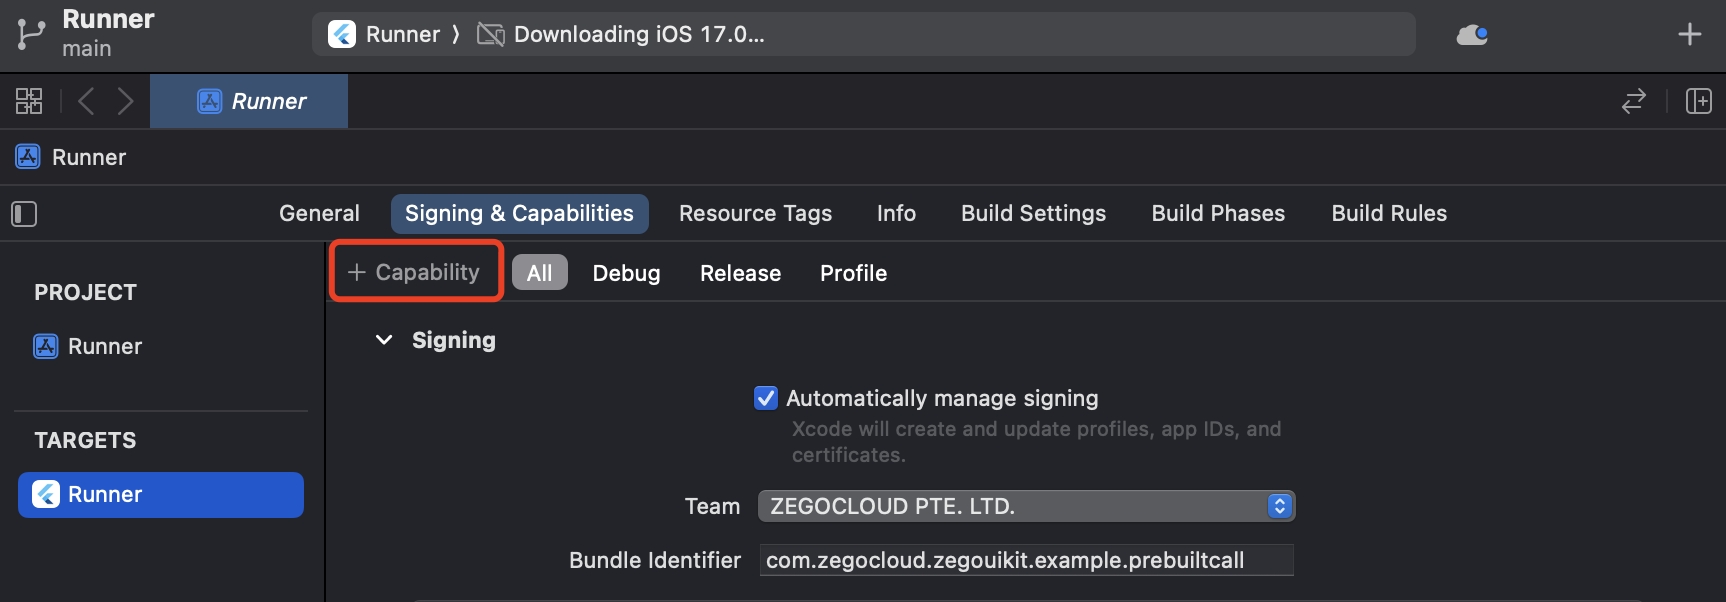)
And double-click on Push Notifications to add this feature.
)
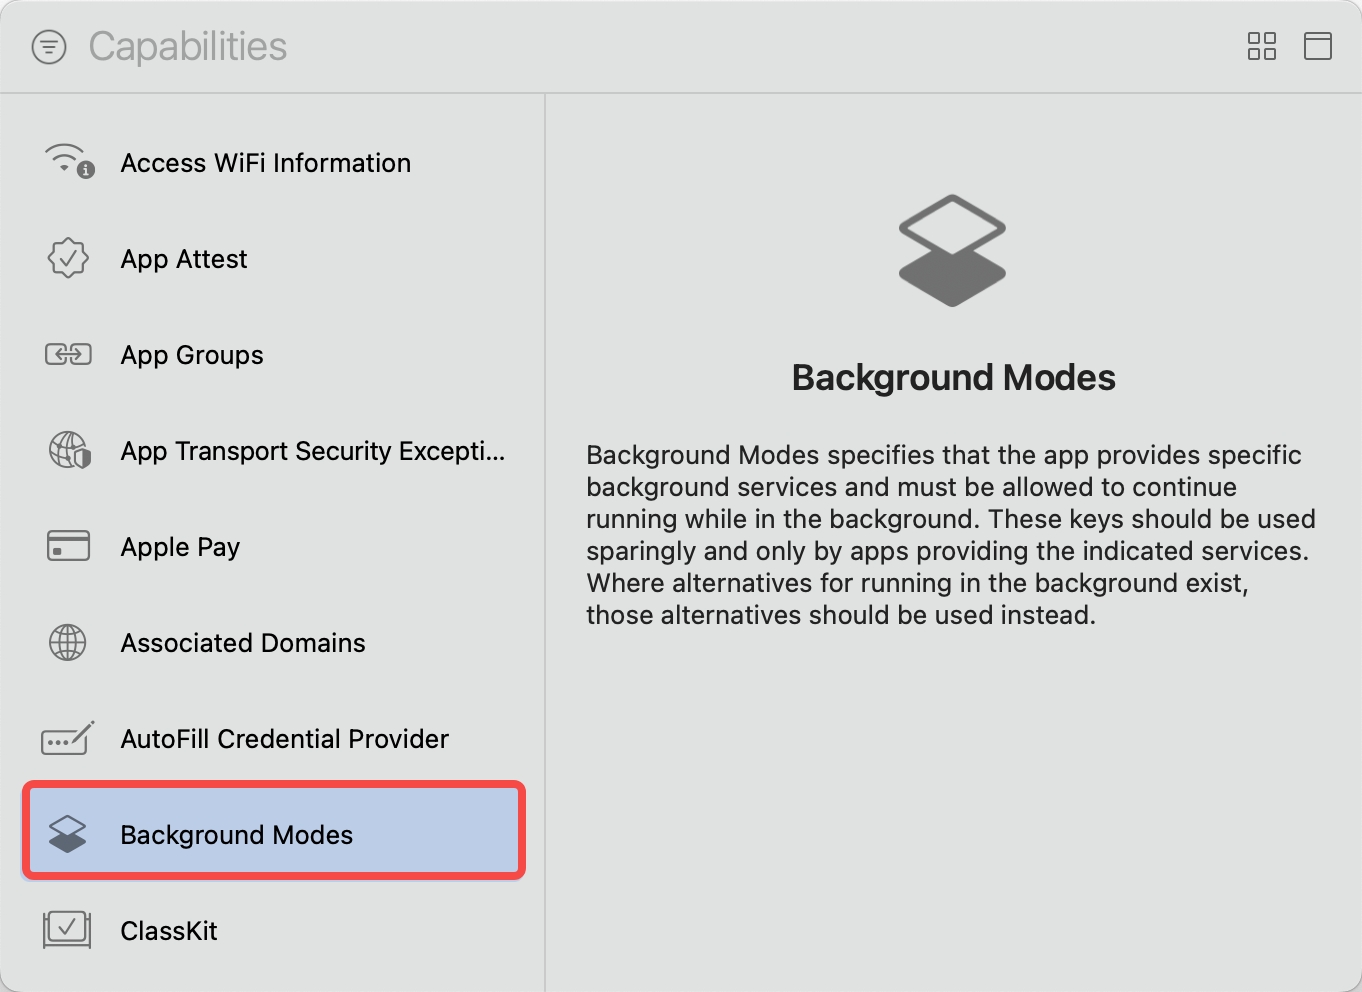
Open the project with Xcode, and click the+ Capability on the Signing & Capabilities page again.
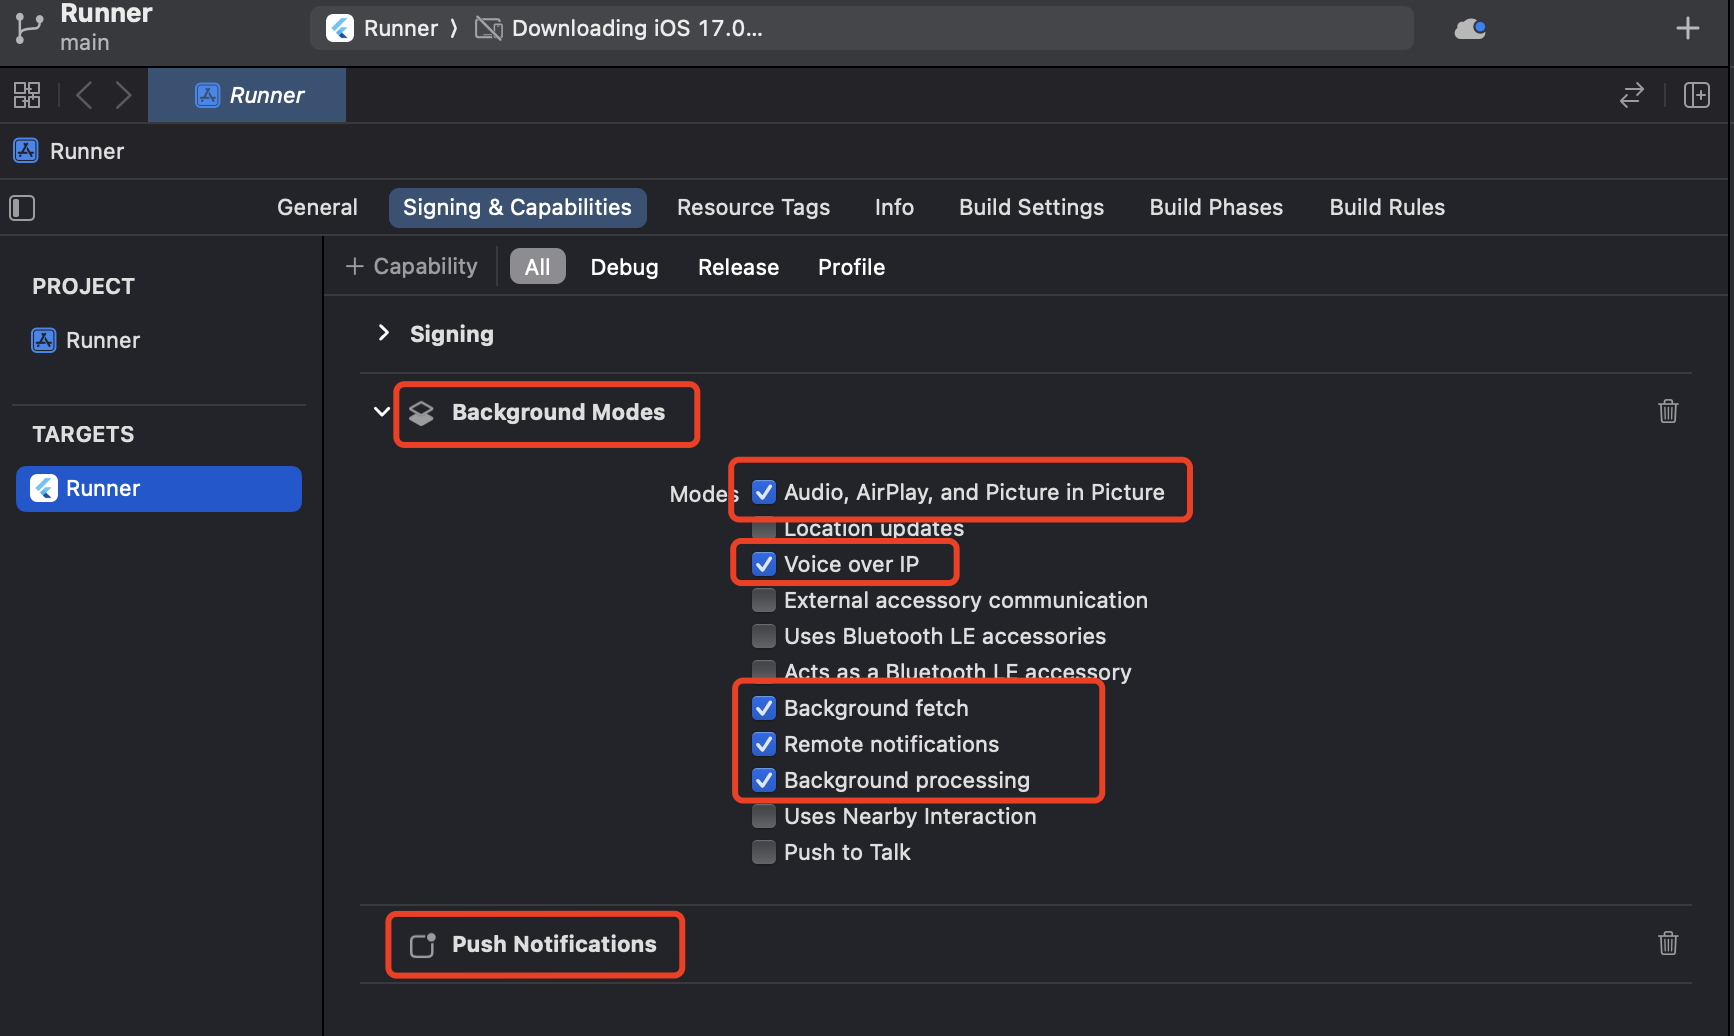
And double-click on Background Modes in the pop-up window. This will allow you to see the Background Modes configuration in the Signing & Capabilities.
)
)
)
Now you have finished all the steps!
You can simply click the Run in XCode to run and test your App on your device.
