提交工单
咨询集成、功能及报价等问题
Run the following code in your project's root directory:
flutter pub add zego_uikit_prebuilt_live_streamingNow in your Dart code, import the Live Streaming Kit SDK.
import 'package:zego_uikit_prebuilt_live_streaming/zego_uikit_prebuilt_live_streaming.dart';appID and appSign of your project.userID and userName for connecting the Live Streaming Kit service. liveID represents the live streaming you want to start or watch (only supports single-host live streaming for now). userID, userName and liveID can only contain numbers, letters, and underlines (_). liveID will enter the same live streaming.With the same liveID, only one user can enter the live stream as host. Other users need to enter the live stream as the audience.
class LivePage extends StatelessWidget {
  final String liveID;
  final bool isHost;

  const LivePage({Key? key, required this.liveID, this.isHost = false}) : super(key: key);

  @override
  Widget build(BuildContext context) {
    return SafeArea(
      child: ZegoUIKitPrebuiltLiveStreaming(
        appID: yourAppID,// Fill in the appID that you get from ZEGOCLOUD Admin Console.
        appSign: yourAppSign,// Fill in the appSign that you get from ZEGOCLOUD Admin Console.
        userID: 'user_id',
        userName: 'user_name',
        liveID: liveID,
        config: isHost
            ? ZegoUIKitPrebuiltLiveStreamingConfig.host()
            : ZegoUIKitPrebuiltLiveStreamingConfig.audience(),
      ),
    );
  }
}
Then, you can start a live stream. And the audience can watch the live stream by entering the liveID.
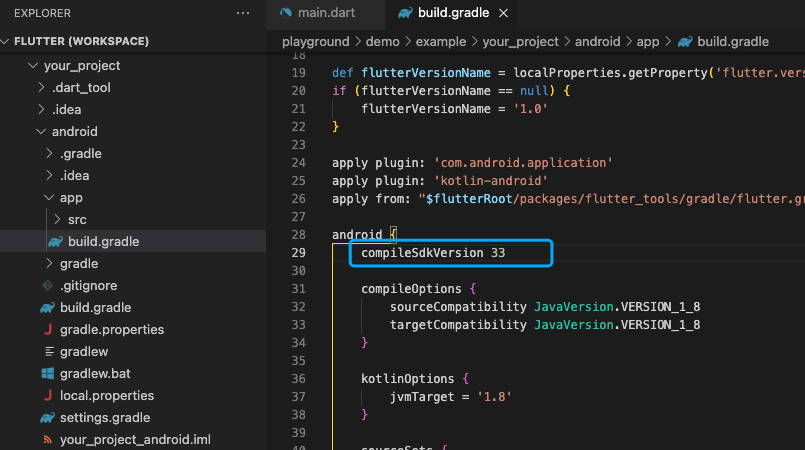
your_project/android/app/build.gradle file, and modify the compileSdkVersion to 33.
)
Add app permissions.
Open the file your_project/app/src/main/AndroidManifest.xml, and add the following:
<uses-permission android:name="android.permission.ACCESS_WIFI_STATE" />
<uses-permission android:name="android.permission.RECORD_AUDIO" />
<uses-permission android:name="android.permission.INTERNET" />
<uses-permission android:name="android.permission.ACCESS_NETWORK_STATE" />
<uses-permission android:name="android.permission.CAMERA" />
<uses-permission android:name="android.permission.BLUETOOTH" />
<uses-permission android:name="android.permission.MODIFY_AUDIO_SETTINGS" />
<uses-permission android:name="android.permission.WRITE_EXTERNAL_STORAGE" />
<uses-permission android:name="android.permission.READ_PHONE_STATE" />
<uses-permission android:name="android.permission.WAKE_LOCK" />)
Prevent code obfuscation.
To prevent obfuscation of the SDK public class names, do the following:
a. In your project's your_project > android > app folder, create a proguard-rules.pro file with the following content as shown below:
-keep class **.zego.** { *; }b. Add the following config code to the release part of the your_project/android/app/build.gradle file.
proguardFiles getDefaultProguardFile('proguard-android.txt'), 'proguard-rules.pro')
a. open the your_project/ios/Podfile file, and add the following to the post_install do |installer| part:
# Start of the permission_handler configuration
target.build_configurations.each do |config|
  config.build_settings['GCC_PREPROCESSOR_DEFINITIONS'] ||= [
    '$(inherited)',
    'PERMISSION_CAMERA=1',
    'PERMISSION_MICROPHONE=1',
  ]
end
# End of the permission_handler configuration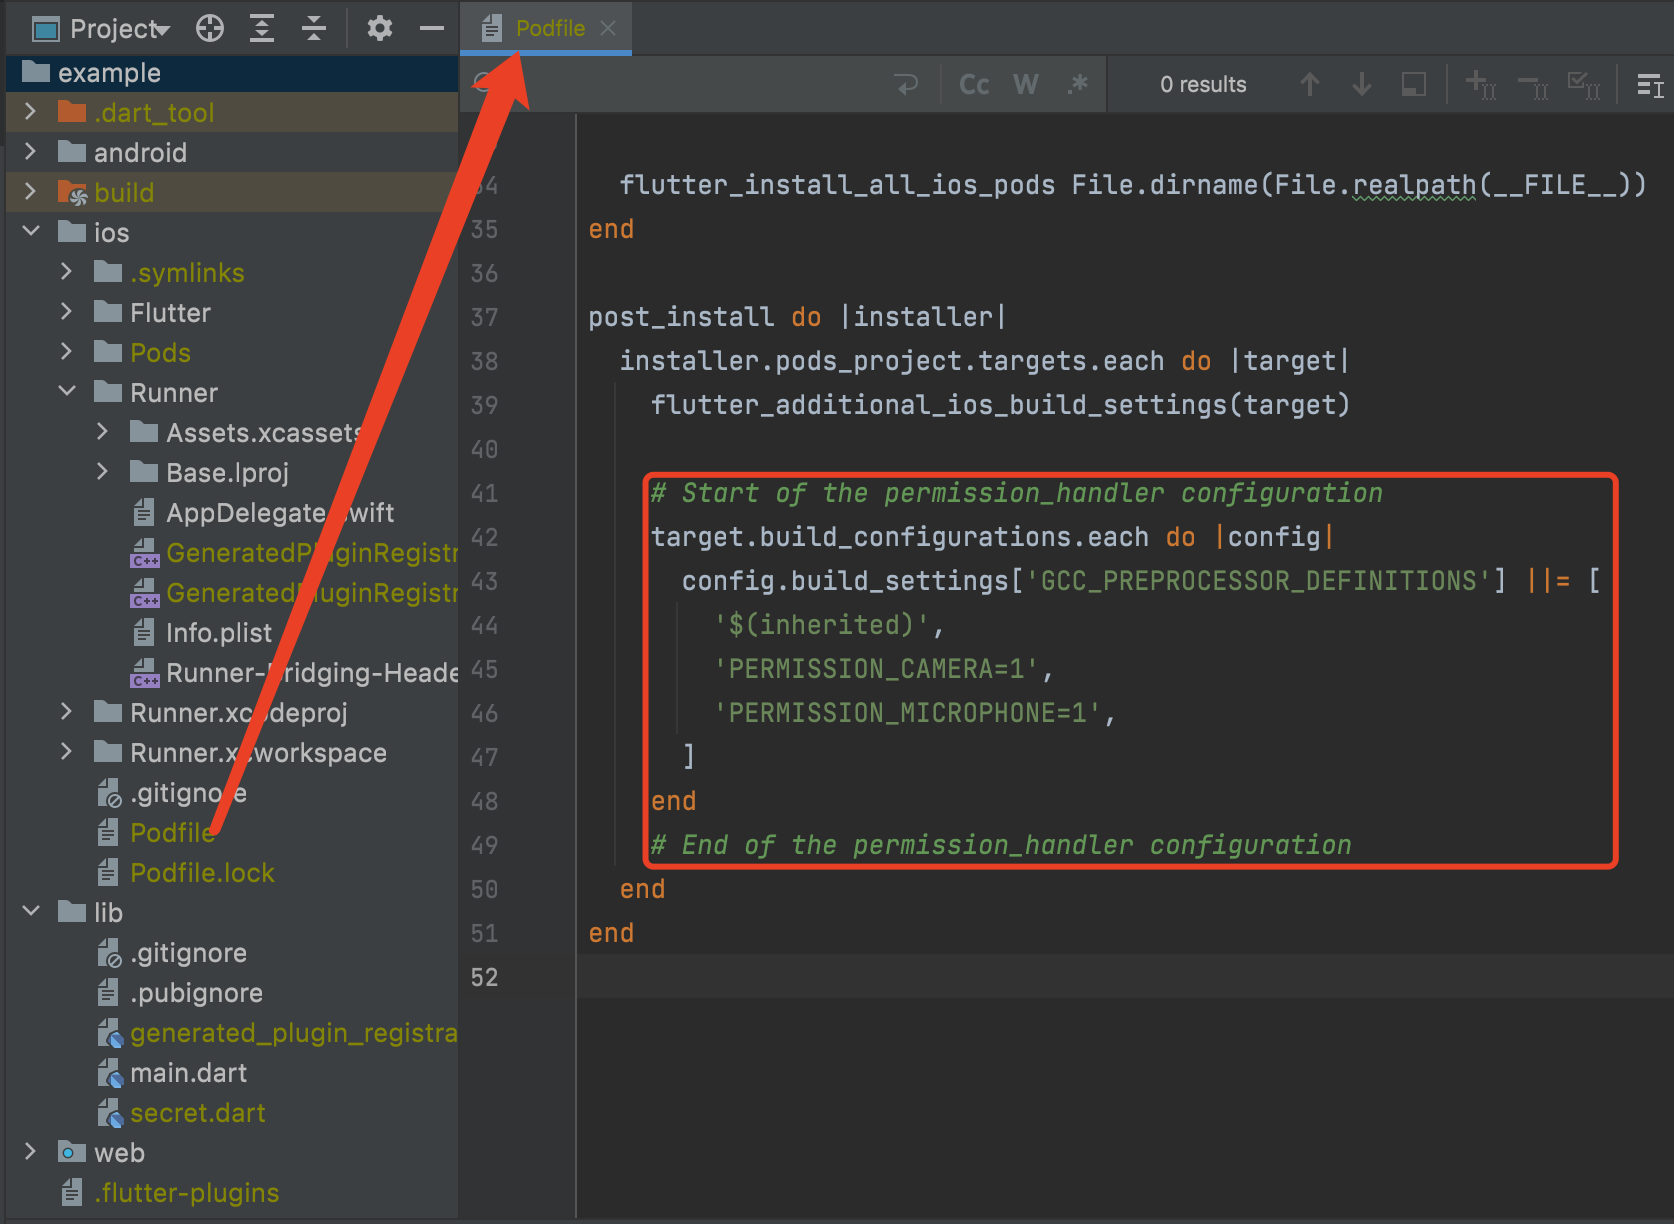)
b. open the your_project/ios/Runner/Info.plist file, and add the following to the dict part:
    <key>NSCameraUsageDescription</key>
    <string>We require camera access to connect to a live</string>
    <key>NSMicrophoneUsageDescription</key>
<string>We require microphone access to connect to a live</string>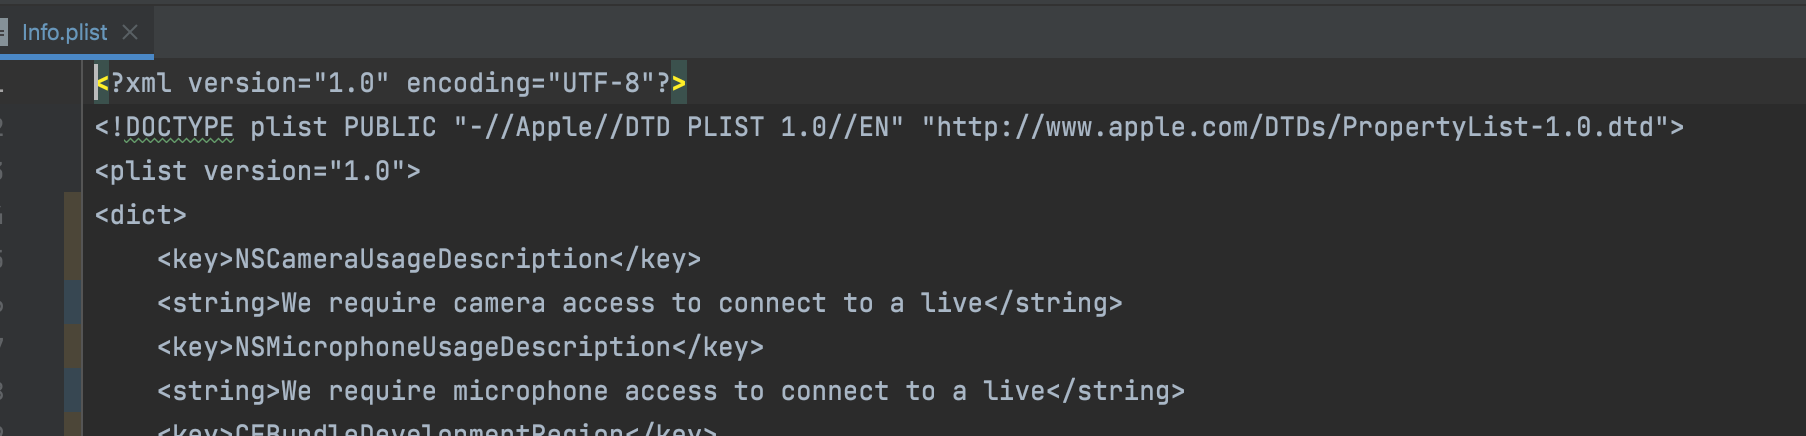)
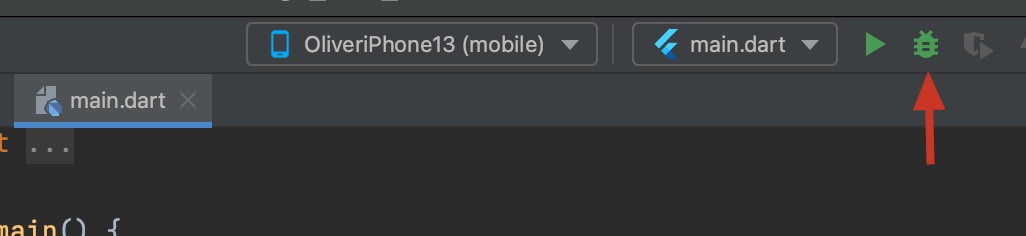
Now you can simply click the Run or Debug button to run and test your App on the device.
)
