提交工单
咨询集成、功能及报价等问题
This doc will guide you to integrate the In-app Chat Kit and start a chat quickly.
AppID and AppSign of your project. 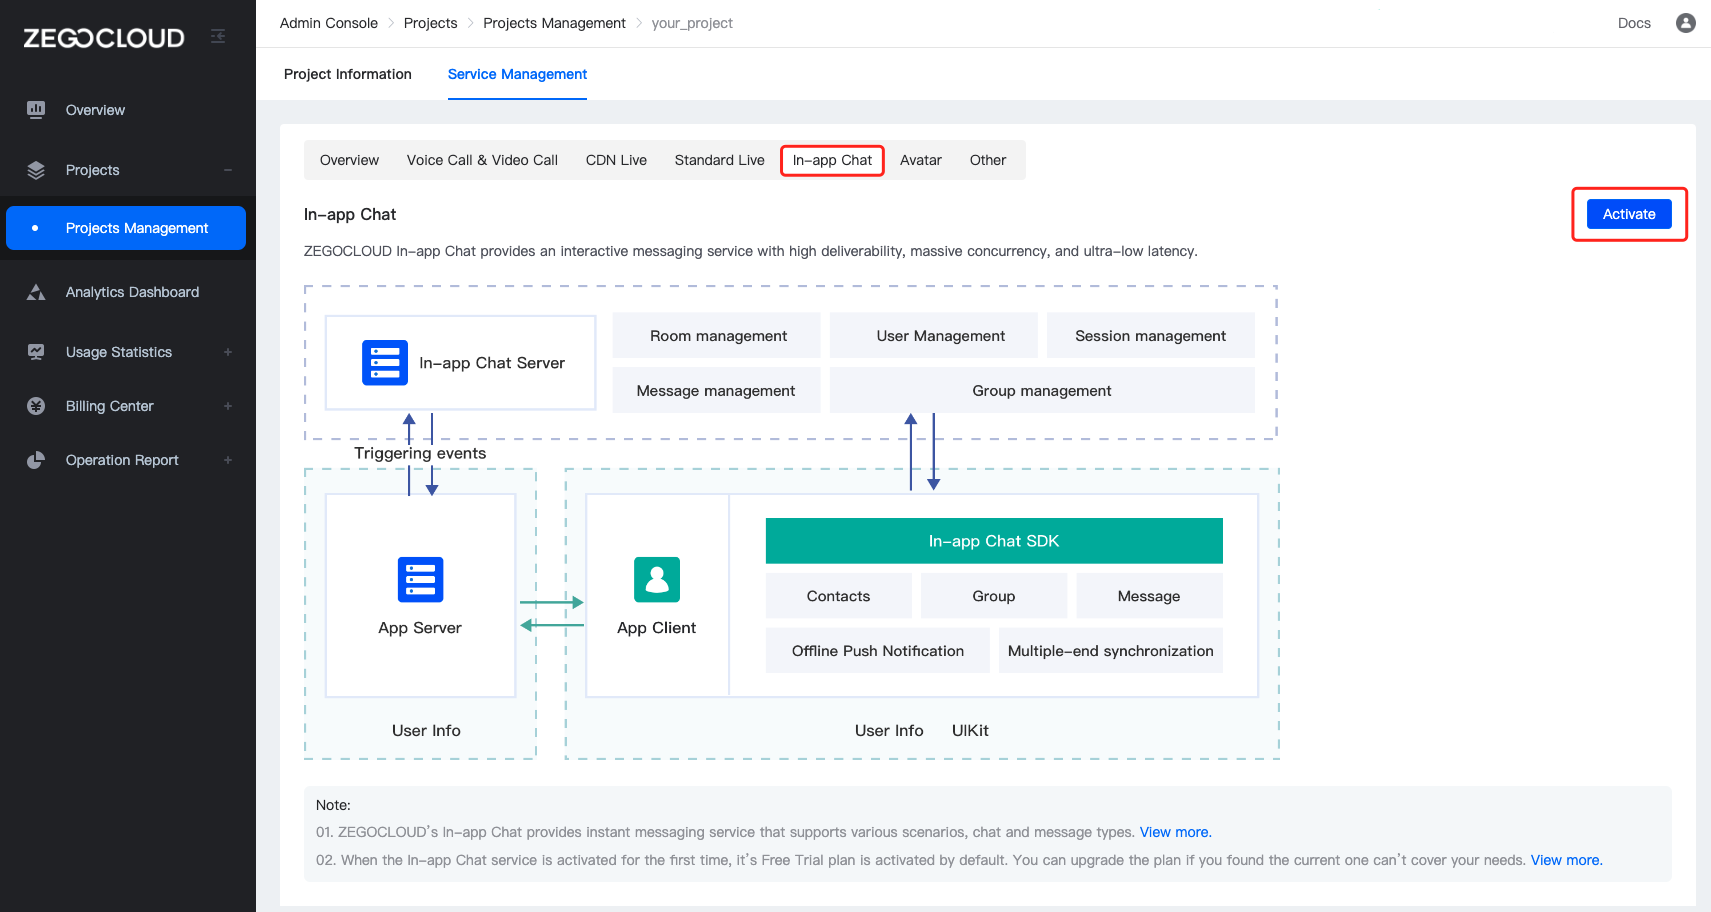)
The Cocoapods version needs to be 1.10.0 or later.
Podfile file.pod initPodfile, add pod 'ZIMKit', and change MyProject to your target name.target 'MyProject' do
use_frameworks!
pod 'ZIMKit'
endpod repo update to update the local index to make sure the latest version of SDK can be installed.pod repo updatepod install to install the SDK.pod install/// AppDelegate.swift
import UIKit
import ZIMKit
@main
class AppDelegate: UIResponder, UIApplicationDelegate {
func application(_ application: UIApplication, didFinishLaunchingWithOptions launchOptions: [UIApplication.LaunchOptionsKey: Any]?) -> Bool {
let appID: UInt32 = <#your appID#> // The AppID you get from ZEGOCLOUD Admin Console.
let appSign: String = <#your appSign#> // The AppSign you get from ZEGOCLOUD Admin Console.
ZIMKit.initWith(appID: appID, appSign: appSign)
}
}After initializing the In-app Chat Kit, you will need to log in by calling the connectUser: method with your user information.
You can customize rules to generate the user ID and user name. We recommend that you set a meaningful user ID. You can associate the user ID with your business account system.
import UIKit
import ZIMKit

/// your viewController.swift
class ViewController: UIViewController {

    override func viewDidLoad() {
        super.viewDidLoad()

        let connectUserButton = UIButton(type: .custom)
        connectUserButton.setTitle("Connect User And Show", for: .normal)
        connectUserButton.frame = .init(x: 100, y: 100, width: 250, height: 50)
        connectUserButton.addTarget(self, action: #selector(connectUserAction), for: .touchUpInside)
        connectUserButton.backgroundColor = .orange
        view.addSubview(connectUserButton)

    }

    @objc func connectUserAction(_ sender: Any) {
        // Your ID as a user.
        let userID: String = "<#your userID#>"
        // Your name as a user.
        let userName: String = "<#your userName#>"
        // The image you set as the user avatar must be network image. e.g., https://storage.zego.im/IMKit/avatar/avatar-0.png
        let userAvatarUrl: String = "<#your userAvatarUrl#>"

        ZIMKit.connectUser(userID: userID, userName: userName, avatarUrl: userAvatarUrl) { error in
            //  Display the UI views after connecting the user successfully.
            if error.code == .success {
                self?.showConversationListVC()
            }
        }
    }
}/// your viewController.swift
func showConversationListVC() {
let conversationVC = ZIMKitConversationListVC()
let nav = UINavigationController(rootViewController: conversationVC)
nav.modalPresentationStyle = .fullScreen
self.present(nav, animated: true)
}Source Code mode to open the Info.plist file.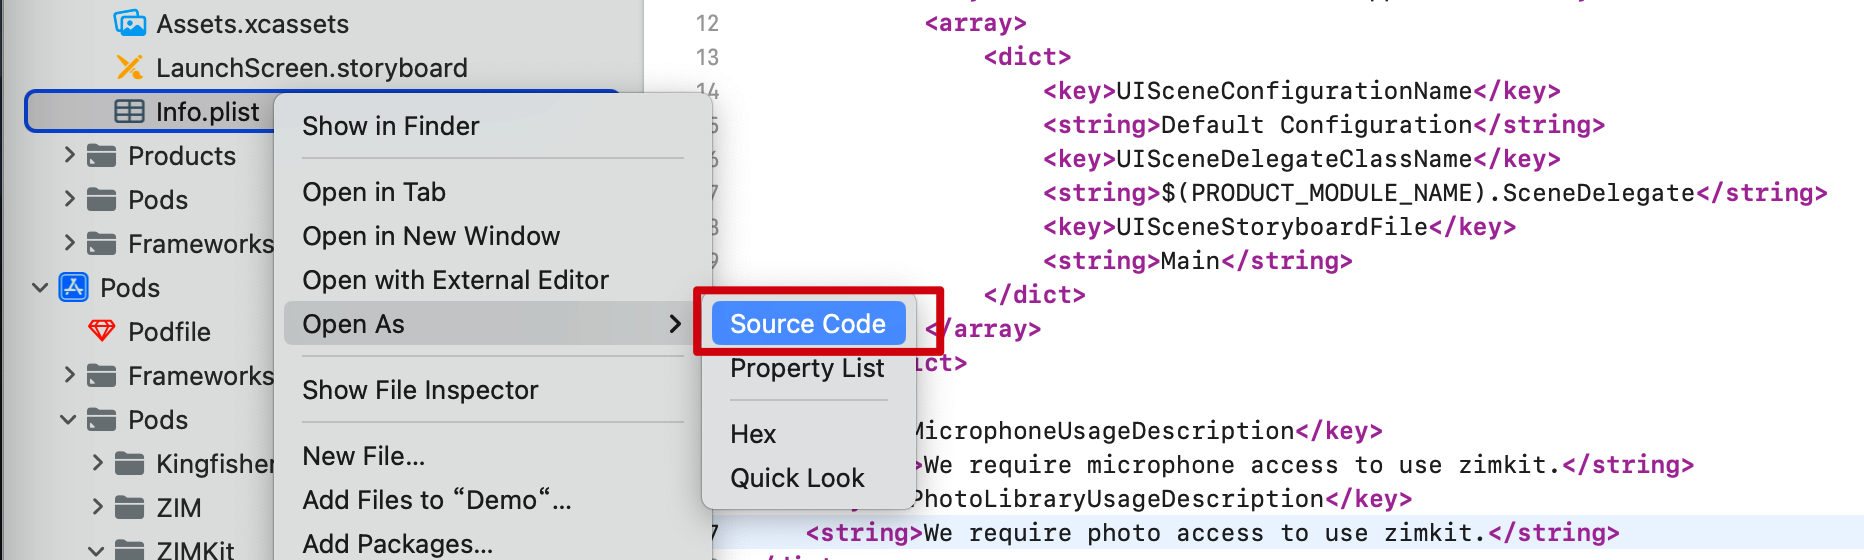)
dict part: <key>NSMicrophoneUsageDescription</key>
<string>We require microphone access to use zimkit.</string>
<key>NSPhotoLibraryUsageDescription</key>
<string>We require photo access to use zimkit.</string>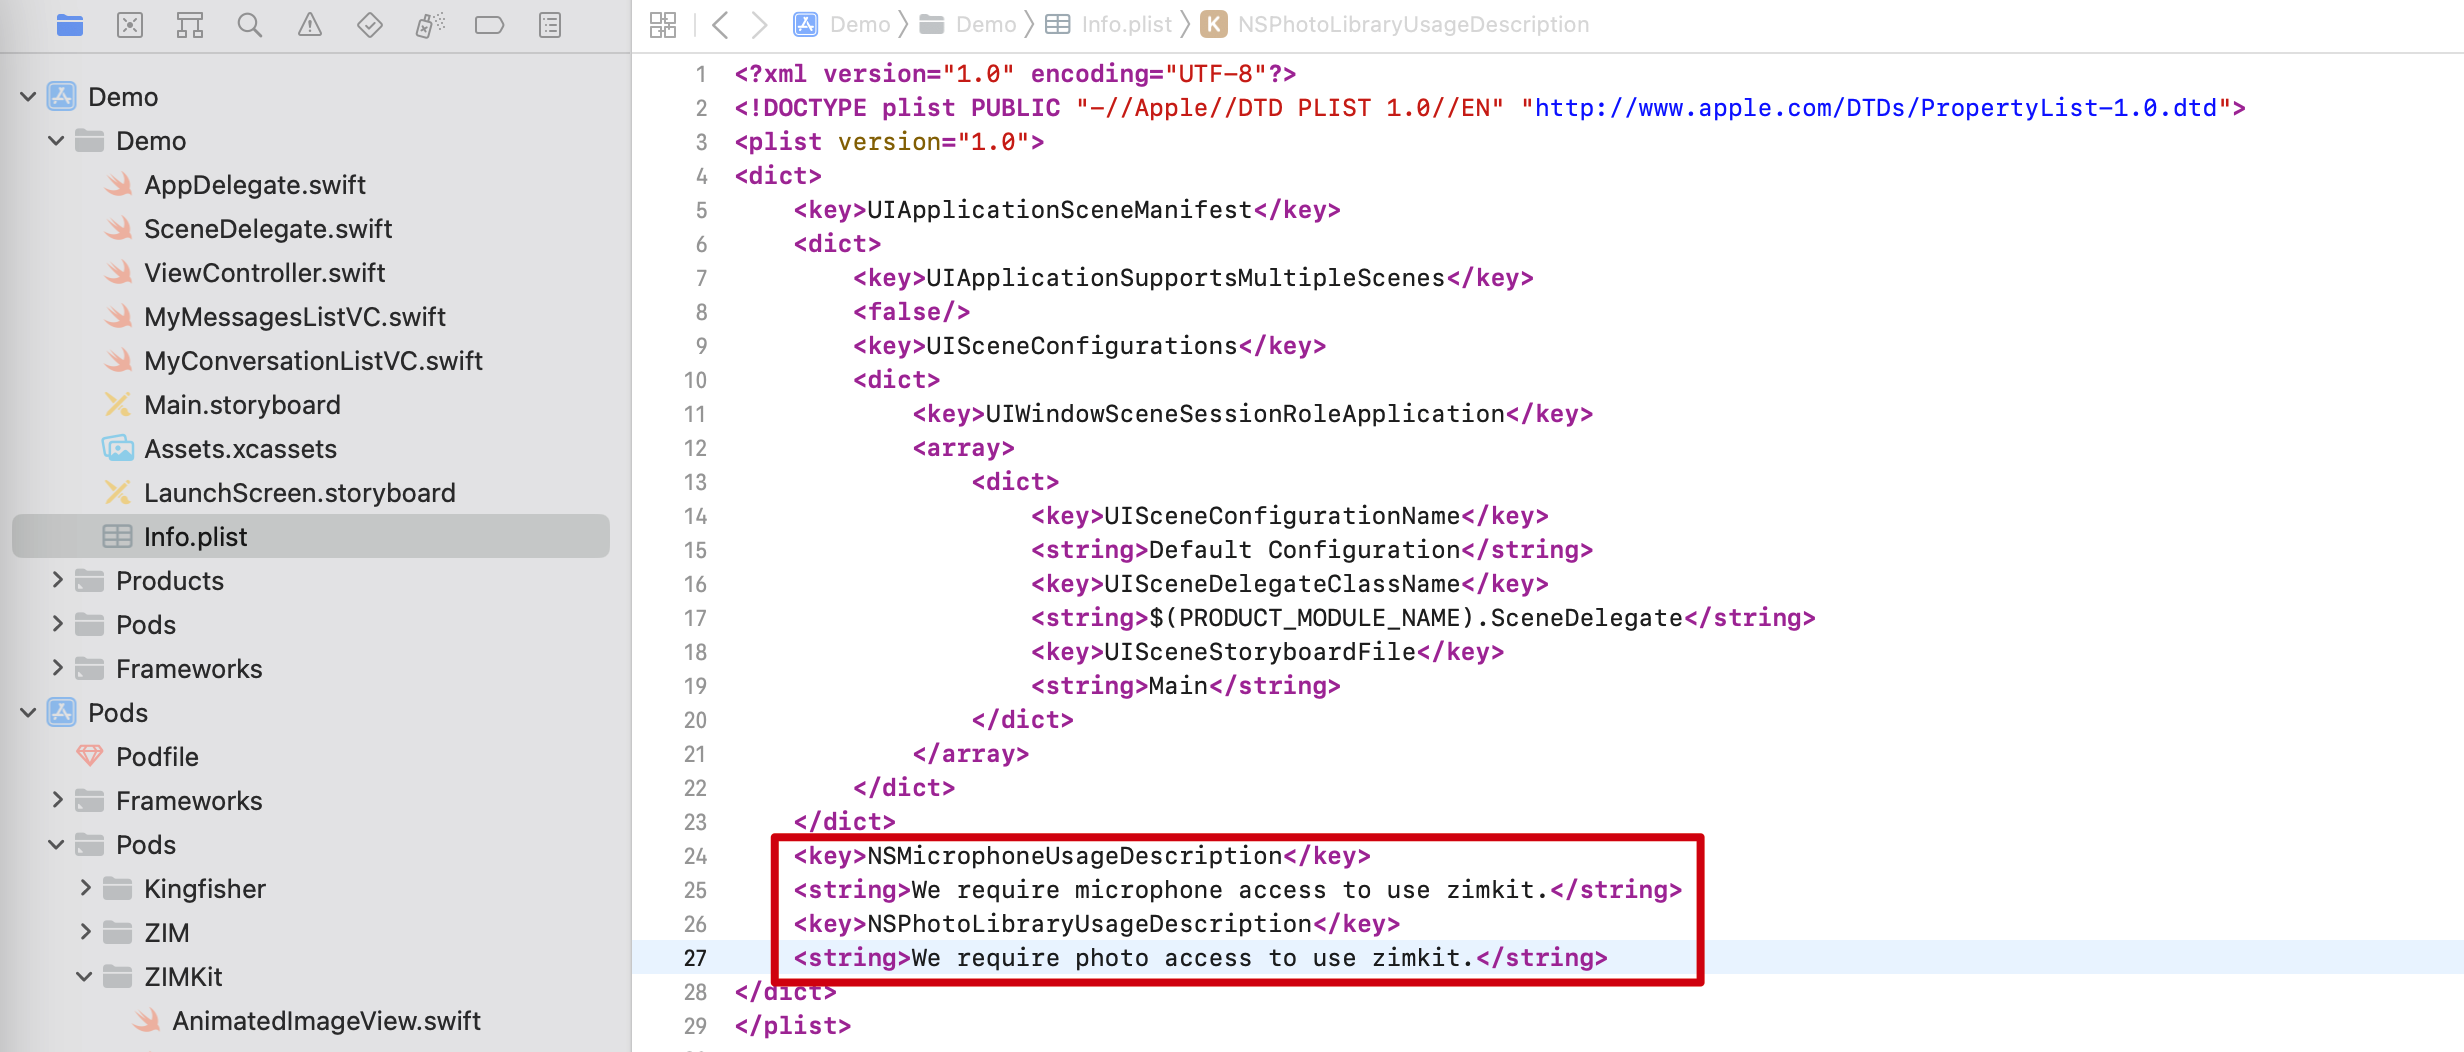)
Ideally, by this point, your app will look like this:
)
In-app Chat Kit supports the following and this section shows you how to implement those respectively:
Whether starting a one-on-one chat or a group chat, the peer user you want to chat with/the users you want to invite to a chat group must have logged in to the In-app Chat UIKit at least once. Otherwise, an error will occur.
userID that is generated using your own business logic. (the userID here refers to the peer user you want to chat with.)userID parameter and run the following code:import UIKit
import ZIMKit
/// your ViewController.swift
class ViewController: UIViewController {
override func viewDidLoad() {
super.viewDidLoad()
}
// Start a 1-on-1 chat after logging in successfully.
func startOneOnOneChat(userID: String) {
let messageVC = ZIMKitMessagesListVC(conversationID: userID, type: .peer)
messageVC.modalPresentationStyle = .fullScreen
present(messageVC, animated: true)
// Replace the [present] method with the following code if you already use the Navigation Controller.
// navigationController?.pushViewController(messageVC, animated: true)
}
}userIDs and groupName that are generated using your own business logic. (the userIDs here refers to the ID list of the users that you want to invite to the group chat.)userIDs and groupName parameters and run the following code:import UIKit
import ZIMKit
/// your ViewController.swift
class ViewController1: UIViewController {
override func viewDidLoad() {
super.viewDidLoad()
}
func createGroupChat(userIDs: [String], groupName: String) {
ZIMKit.createGroup(with: groupName, inviteUserIDs: userIDs) { [weak self] groupInfo, inviteUserErrors, error in
if error.code == .success {
if inviteUserErrors.count > 0 {
// Implement the logic for the prompt window based on your business logic when there is a non-existing user ID in the group.
} else {
// Directly enter the chat page when the group chat is created successfully.
self?.showGroupMessageListVC(groupID: groupInfo.id)
}
} else {
// Implement the logic for the prompt window based on the returned error info when failing to create a group chat.
}
}
}
func showGroupMessageListVC(groupID: String) {
let messageVC = ZIMKitMessagesListVC(conversationID: groupID, type: .group)
messageVC.modalPresentationStyle = .fullScreen
present(messageVC, animated: true)
// Replace the [present] method with the following code if you already use the Navigation Controller.
// navigationController?.pushViewController(messageVC, animated: true)
}
}groupID that is generated using your own business logic. (the groupID here refers to the group chat you want to join.)groupID parameter and run the following code:import UIKit
import ZIMKit
/// your ViewController.swift
class ViewController1: UIViewController {
override func viewDidLoad() {
super.viewDidLoad()
}
func joinGroupChat(_ groupID: String) {
ZIMKit.joinGroup(by: groupID) { [weak self] groupInfo, error in
if error.code == .success {
// Display the group chat page after joining a group chat successfully.
self?.showGroupMessageListVC(groupID: groupInfo.id)
}
}
}
func showGroupMessageListVC(groupID: String) {
let messageVC = ZIMKitMessagesListVC(conversationID: groupID, type: .group)
messageVC.modalPresentationStyle = .fullScreen
present(messageVC, animated: true)
// Replace the [present] method with the following code if you already use the Navigation Controller.
// navigationController?.pushViewController(messageVC, animated: true)
}
}Need help or want to raise your questions? Click the button below to join our Discord community to get quick responses.
Join Discord community