提交工单
咨询集成、功能及报价等问题
This document describes how to make your first voice/video call with the ZEGO Call SDK. To implement the call capability, you will need to While you will need to implement the UI logic on your own when integrating the ZEGO Call SDK to implement the call capability.
To implement the call capability more quickly, we recommend you try our CallUIKit, which already integrated the UI logic and can be integrated easier.
ZEGO Call uses the Firebase Cloud Functions as the business server by default, we recommend you activate and deploy it before integrating the Call SDK.
To use your own business server instead of using the Firebase, refer to the Use ZEGO Call with your business server.
Create a Firebase project in the Firebase console. For details, see Firebase Documentation.
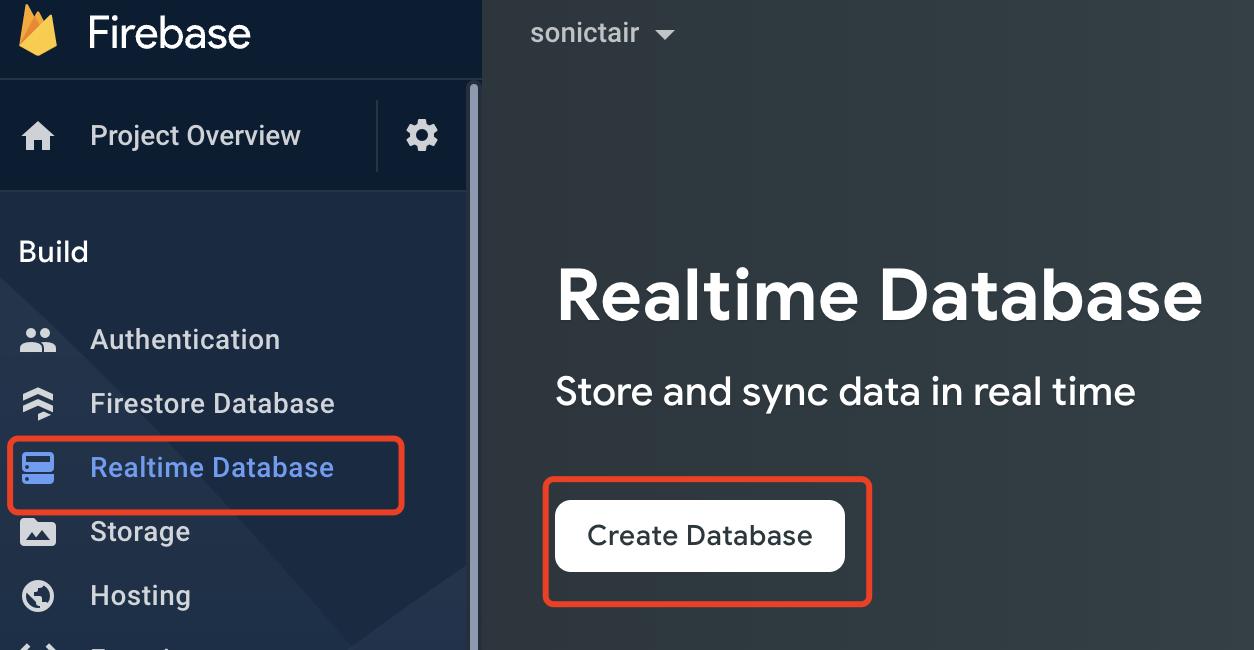
Create a new Realtime Database in Firebase.
)
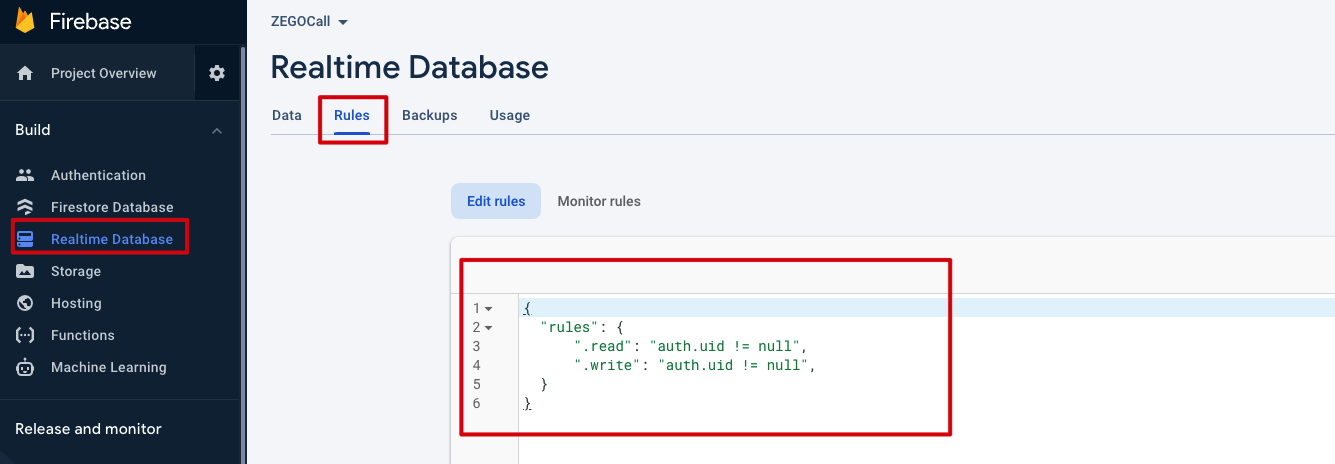
Edit the rules of the Realtime Database by adding the following:
{
  "rules": {
        ".read": "auth.uid != null",
        ".write": "auth.uid != null",
  }
})
Install the CLI via npm.
npm install -g firebase-toolsRun the firebase login to log in via the browser and authenticate the firebase tool.
Go to your Firebase project directory.
Run firebase init functions. The tool gives you an option to install dependencies with npm. It is safe to decline if you want to manage dependencies in another way, though if you do decline you'll need to run npm install before emulating or deploying your functions.
Download the Cloud function sample code.
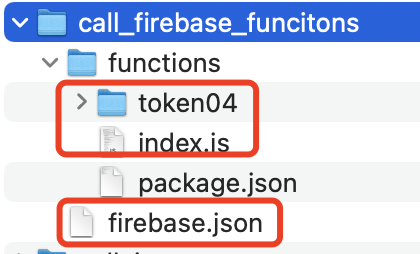
Copy the firebase.json and functions\index.js files in the sample code to your cloud function project, overwrite files with the same name.
Copy the functions\token04 folder from the cloud function project directory, and put it in the same folder together with the index.js.
)
Modify the index.js file, fill in the AppID and ServerSecret you get from ZEGOCLOUD Admin Console correctly.
)
In Firebase CLI, run the firebase deploy --only functions command to deploy the cloud functions.
To integrate the SDK automatically with CocoaPods, do the following:
Download the Sample codes, and copy the ZEGOCall folder to your project directory (if you have no project, create a new one).
)
In Terminal, navigate to your project directory, run the pod init command to create a Podfile, and then add the following to the file.
pod 'ZegoExpressEngine'

pod 'FirebaseAuth'
pod 'GoogleSignIn'
pod 'Firebase/Database'
pod 'Firebase/Analytics'
pod 'Firebase/Crashlytics'
pod 'Firebase/Messaging'
pod 'Firebase/Functions'
)
In Terminal, navigate to the directory where the Podfile locates, and run the pod install command.
pod installRestart the Xcode, and open the newly generated .workspace file.
Permissions can be set as needed.
)
Privacy-Camera Usage Description
Privacy-Microphone Usage Description
)
)
)
)
)
)
)
To initialize the ZEGOCall SDK, get the ServiceManager instance, pass the AppID of your project.
// Initialize the SDK. We recommend you call this method when the application starts.
// YOUR_APP_ID is the AppID you get from ZEGOCLOUD Admin Console.
func application(_ application: UIApplication, didFinishLaunchingWithOptions launchOptions: [UIApplication.LaunchOptionsKey: Any]?) -> Bool {
    ServiceManager.shared.initWithAppID(appID: YOUR_APP_ID) { result in
        // Callback for the result of init.

    };
    return true
}
To receive callbacks, set the corresponding delegate to self.
ServiceManager.shared.userService.delegate = self
ServiceManager.shared.callService.delegate = self
ServiceManager.shared.deviceService.delegate = selfZEGO Call does not provide user management capabilities yet. You will need to have users log in to Firebase and then call the setLocalUser method to set user information to Call SDK based on the login result.
Firebase provides multiple login authentication modes. The following uses Google login as an example. For more modes, refer to the Firebase official.
var userID: String?
var userName: String?

GIDSignIn.sharedInstance.signIn(with: config, presenting: self) { user, error in
       guard let token = user?.authentication.idToken,
             error == nil
          else {
             return
          }

            let credential = GoogleAuthProvider.credential(withIDToken: token, accessToken: "")
        Auth.auth().signIn(with: credential) { result, error in
            guard let user = result?.user else {
                return
            }
            self.userID = user.uid
            self.userName = user.displayName
        }
}

// Set the local user info.
ServiceManager.shared.userService.setLocalUser(userID, userName: userName)ZEGOCLOUD Call implements the voice and video call feature using the RTC SDK. The caller and called user join the same room and the stream publishing and stream playing start upon the call gets connected. Therefore, to make an outbound call, you will need to provide a token for the RTC SDK for validation. For details, see Use Tokens for authentication.
Before making or accepting an outbound call, you will need to get a Token from the Firebase Cloud Functions.
// userID refers to the ID of the logged in user.
// [effectiveTimeInSeconds] refers to the valid period (seconds)of the Token.
func getTokenFromServer(_ userID: String, _ effectiveTimeInSeconds: Int, callback: @escaping TokenCallback) {
        let functions = Functions.functions()
        let data: [String: Any] = [
            "id": userID,
            "effective_time": effectiveTimeInSeconds
        ]
        functions.httpsCallable("getToken").call(data) { result, error in
            if let error = error as NSError? {
                callback(.failure())
                return
            }
            guard let dict = result?.data as? [String: Any],
                  let token = dict["token"] as? String
            else {
                callback(.failure())
                return
            }
            callback(.success(token))
        }
}
To make an outbound voice call, call the callUser method and set the type parameter to CallType.voice.
// userInfo refers to the user info(ID and name) of the user you want to call.
// token refers to the token you provide to the RTC SDK for validation.
// CallType.voice indicates that you make a voice call.
ServiceManager.shared.callService.callUser(userInfo, token, type: .voice) { result in
    // Callback for the result of make a voice call.
}
To make an outbound video call, call the callUser method and set the type parameter to CallType.video.
// userInfo refers to the user info(ID and name) of the user you want call.
// token refers to the token you provide to the RTC SDK for validation.
// CallType.voice indicates that you make a video call.
ServiceManager.shared.callService.callUser(userInfo, token, type: .video) { result in
    // Callback for the result of make a video call.
}
To start the local video preview (using the front-facing camera) when initiating an outbound video call, call the startPlaying method.
// To start the local video preview, pass in your user ID to userID, pass in the view to be previewed to streamView.
ServiceManager.shared.streamService.startPlaying(userID, streamView: streamView)
To cancel the call you just initiated, call the cancelCall method before the call gets answered.
ServiceManager.shared.callService.cancelCall() { result in
    // Callback for the result of cancel a call.
}After a call is made, the called user receives a notification through the callback onReceiveCallInvited.
func onReceiveCallInvited(_ userInfo: UserInfo, type: CallType) {
    // Implement the callback handling logic when receiving an incoming call. For example, you can set a ringing and a UI for call notification.
}
If the call has been canceled before it gets answered, the called user receives a notification through the callback onReceiveCallCanceled.
func onReceiveCallCanceled(_ userInfo: UserInfo) {
    // Implement the callback handling logic when receiving a notification that the incoming call has been canceled. For example, you can set the ringing to stop and the UI to stop notifying.
}
To respond to an incoming call, call the acceptCall method to accept it or call the declineCall method to decline it.
// Accept an incoming call.
// token refers to the token you provide to the RTC SDK for validation.
ServiceManager.shared.callService.acceptCall(token:token) { result in
    // Callback for the result of accept an incoming call.
}

// Decline an incoming call.
ServiceManager.shared.callService.declineCall() { result in
    // Callback for the result of decline an incoming call.
}
After the call gets answered, the caller receives a notification through the callback onReceiveCallAccepted or onReceiveCallDeclined.
When you receive an incoming call, the ZEGO Call SDK will automatically determine that you are in the busy state. In this case, the ZEGO Call SDK will automatically reject other call invitations until you decline or end the current call.
// Callback: the call has been accepted.
func onReceiveCallAccepted(_ userInfo: UserInfo) {
    // Implement the callback handling logic as needed.
}

// Callback: the call has been declined.
// It indicates the callee declines the call actively when the [DeclineType] is [decline].
// It indicates the callee is busy when the [DeclineType] is [busy], and the SDK automatically declines the call.
func onReceiveCallDeclined(_ userInfo: UserInfo , type: DeclineType) {
    // Implement the callback handling logic as needed.
}
After the called user accepts the call, both the caller and called user will need to call the startPlaying method to start playing the audio and video streams to begin a call.
// userID refers to the ID of the user that you are on the line with.
// In a voice call, the streamView is nil.
// In a video call, the streamView will be the view to be displayed during the video call.
// To preview your local video preview during a video call, call this method again. And pass in your user ID to the userID, pass in the view to be previewed to streamView.
ServiceManager.shared.streamService.startPlaying(userID, streamView: streamView)To enable or disable the camera during a video call, call the enableCamera method.
// To enable the camera, set it to [true]. To disable the camera, set it to [false].
ServiceManager.shared.deviceService.enableCamera(true)
To change the camera during a call, call the useFrontCamera method.
// To use the front-facing camera, set it to [true]. To use the rear camera, set it to [false].
ServiceManager.shared.deviceService.useFrontCamera(true)
To enable or disable the microphone during a voice or video call, call the enableMic method.
// To enable the mircophone, set it to [true]. To disable the microphone, set it to [false].
ServiceManager.shared.deviceService.enableMic(true)
To enable or disable the speaker during a voice or video call, call the enableSpeaker method.
// To enable the speaker, set it to [true]. To disable the speaker, set it to [false].
ServiceManager.shared.deviceService.enableSpeaker(true)For the caller or called user to end a call, call the endCall method.
ServiceManager.shared.callService.endCall() { result in
    // Callback for the result of end a call.
}
Once the call ended, the other user receives a notification through the callback onReceiveCallEnded .
func onReceiveCallEnded() {
    // Implement the callback handling logic as needed. For example, you can disable the UI that shows a call is ongoing.
}When you encounter problems when using your app, call the uploadLog method to upload logs for us to locate and help you faster.
ServiceManager.shared.uploadLog { result in
    // Callback for the result of upload SDK log.
}After finishing using the ZEGO Call, call the unInit method to deinitialize the SDK.
ServiceManager.shared.uninit()
