提交工单
咨询集成、功能及报价等问题
)
2.3.0 or later, you can also use Tokens for authentication. To upgrade the authentication mode, refer to the Upgrade the authentication mode from AppSign to Token.Before integrating the ZegoSuperBoard SDK, ensure that the development environment satisfies the following requirements:
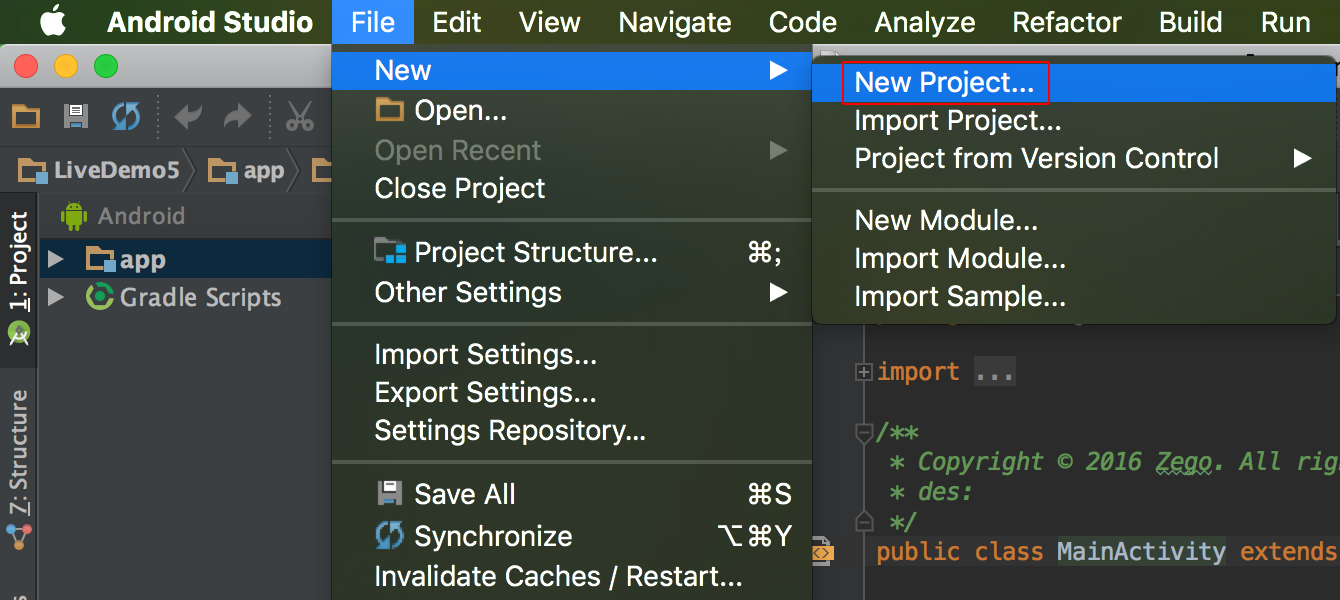
Open the Android Studio and select File > New > New Project.
)
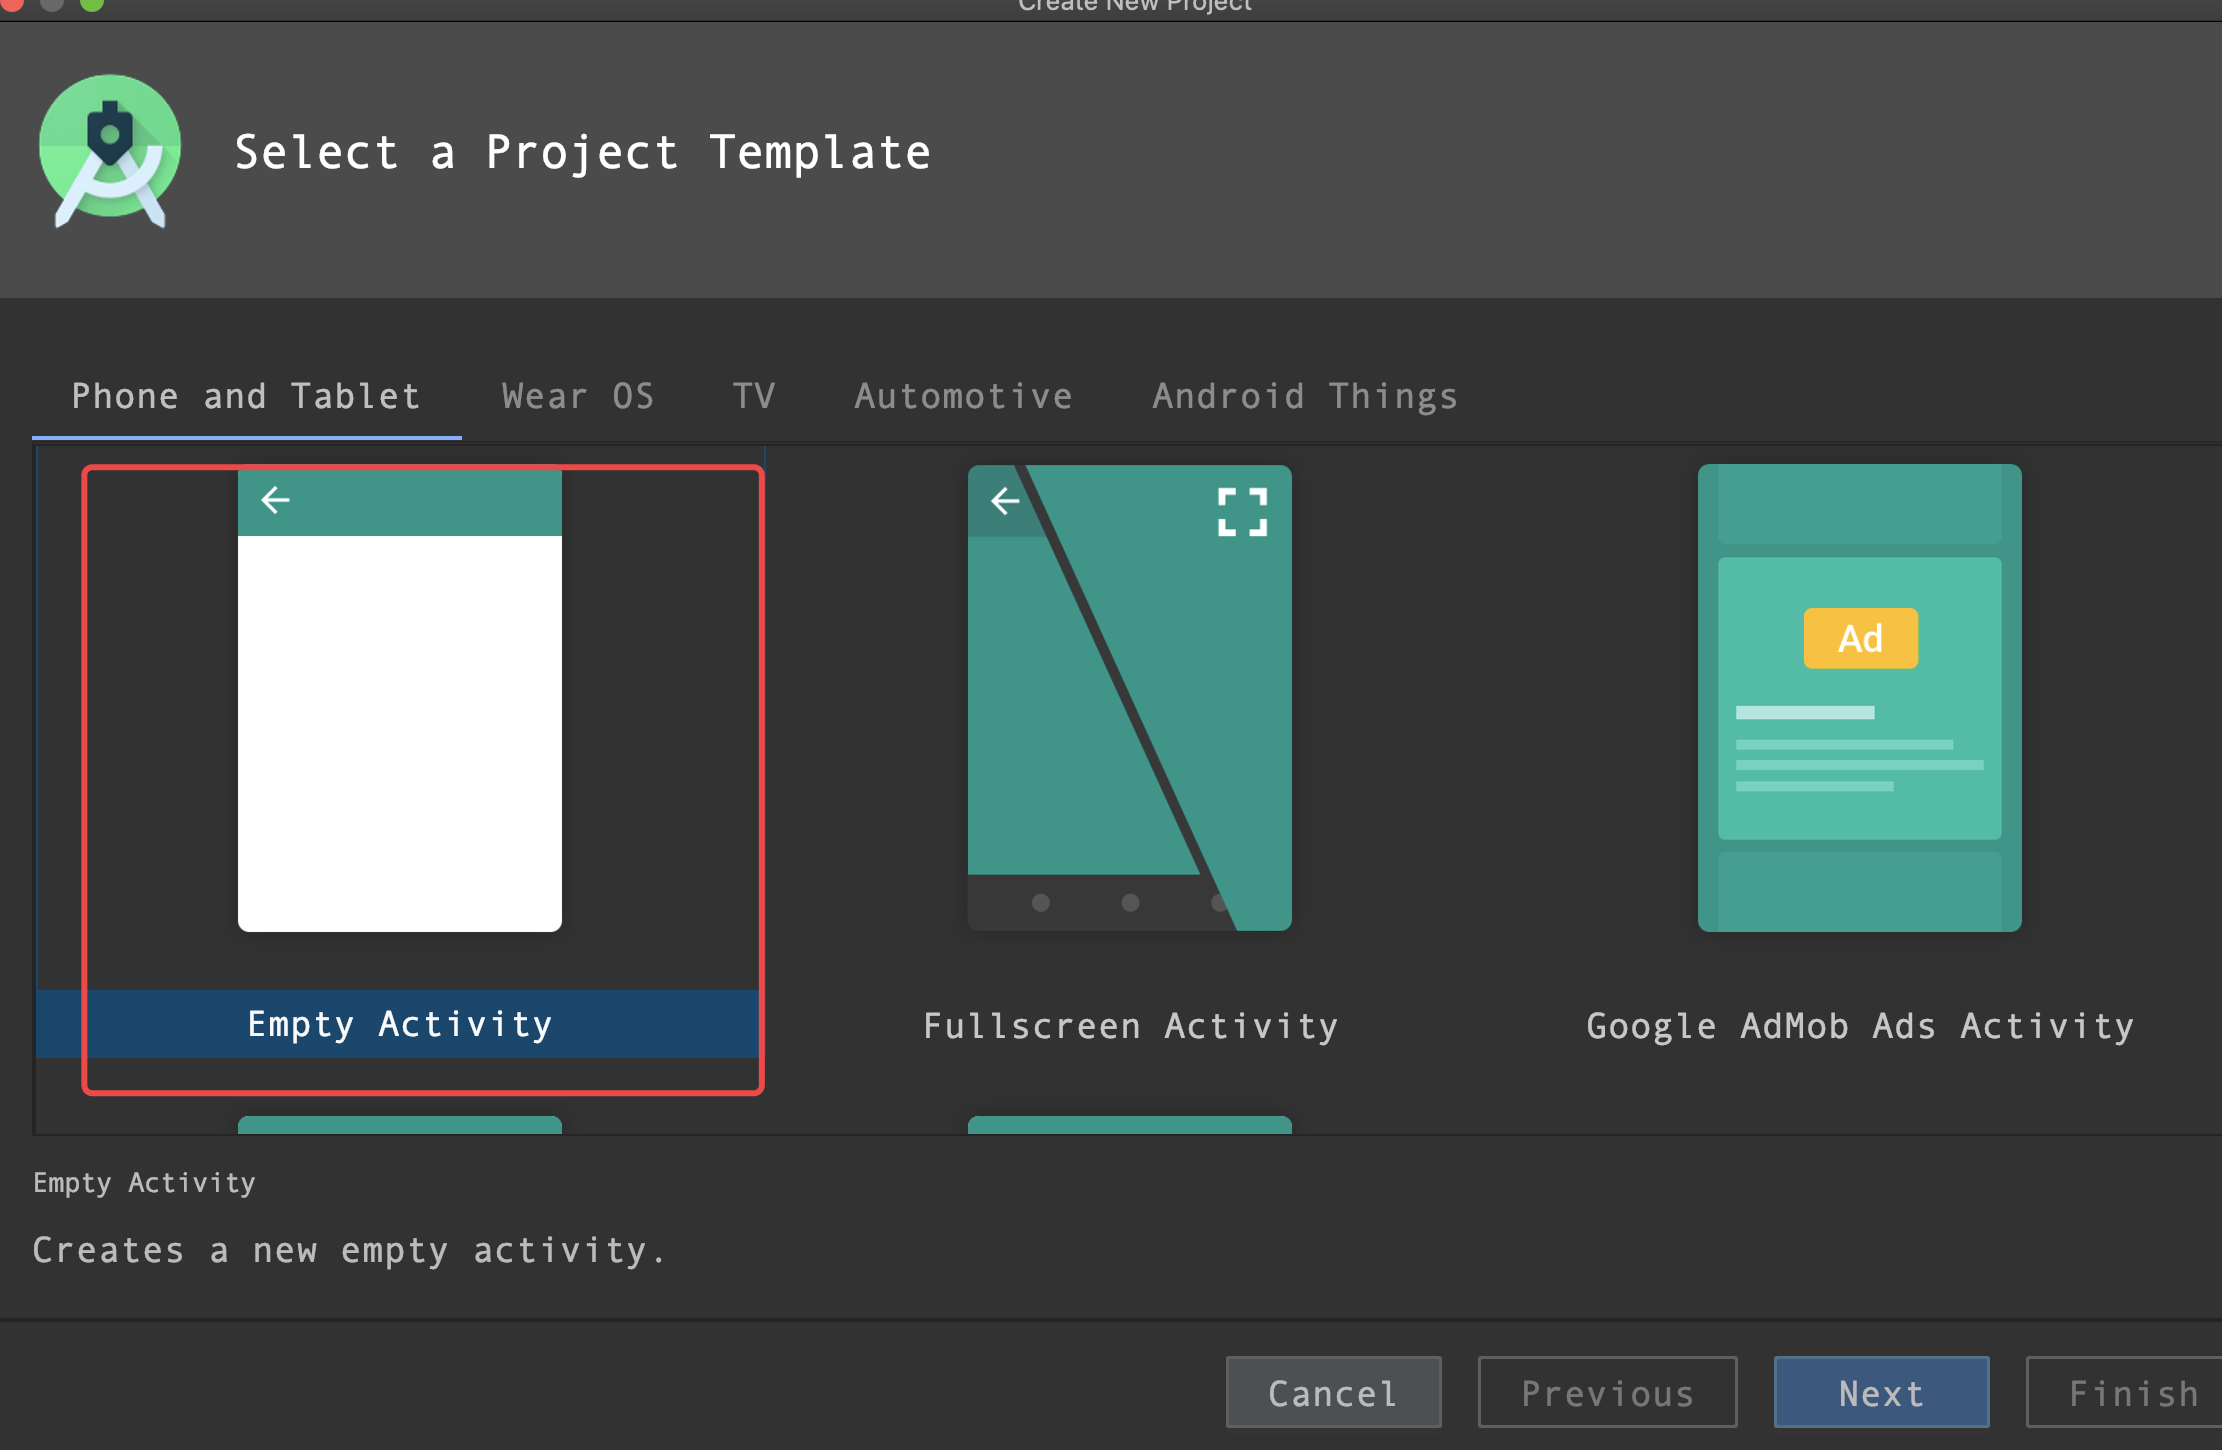
Set the project type to Empty Activity.
)
Select the project storage path.
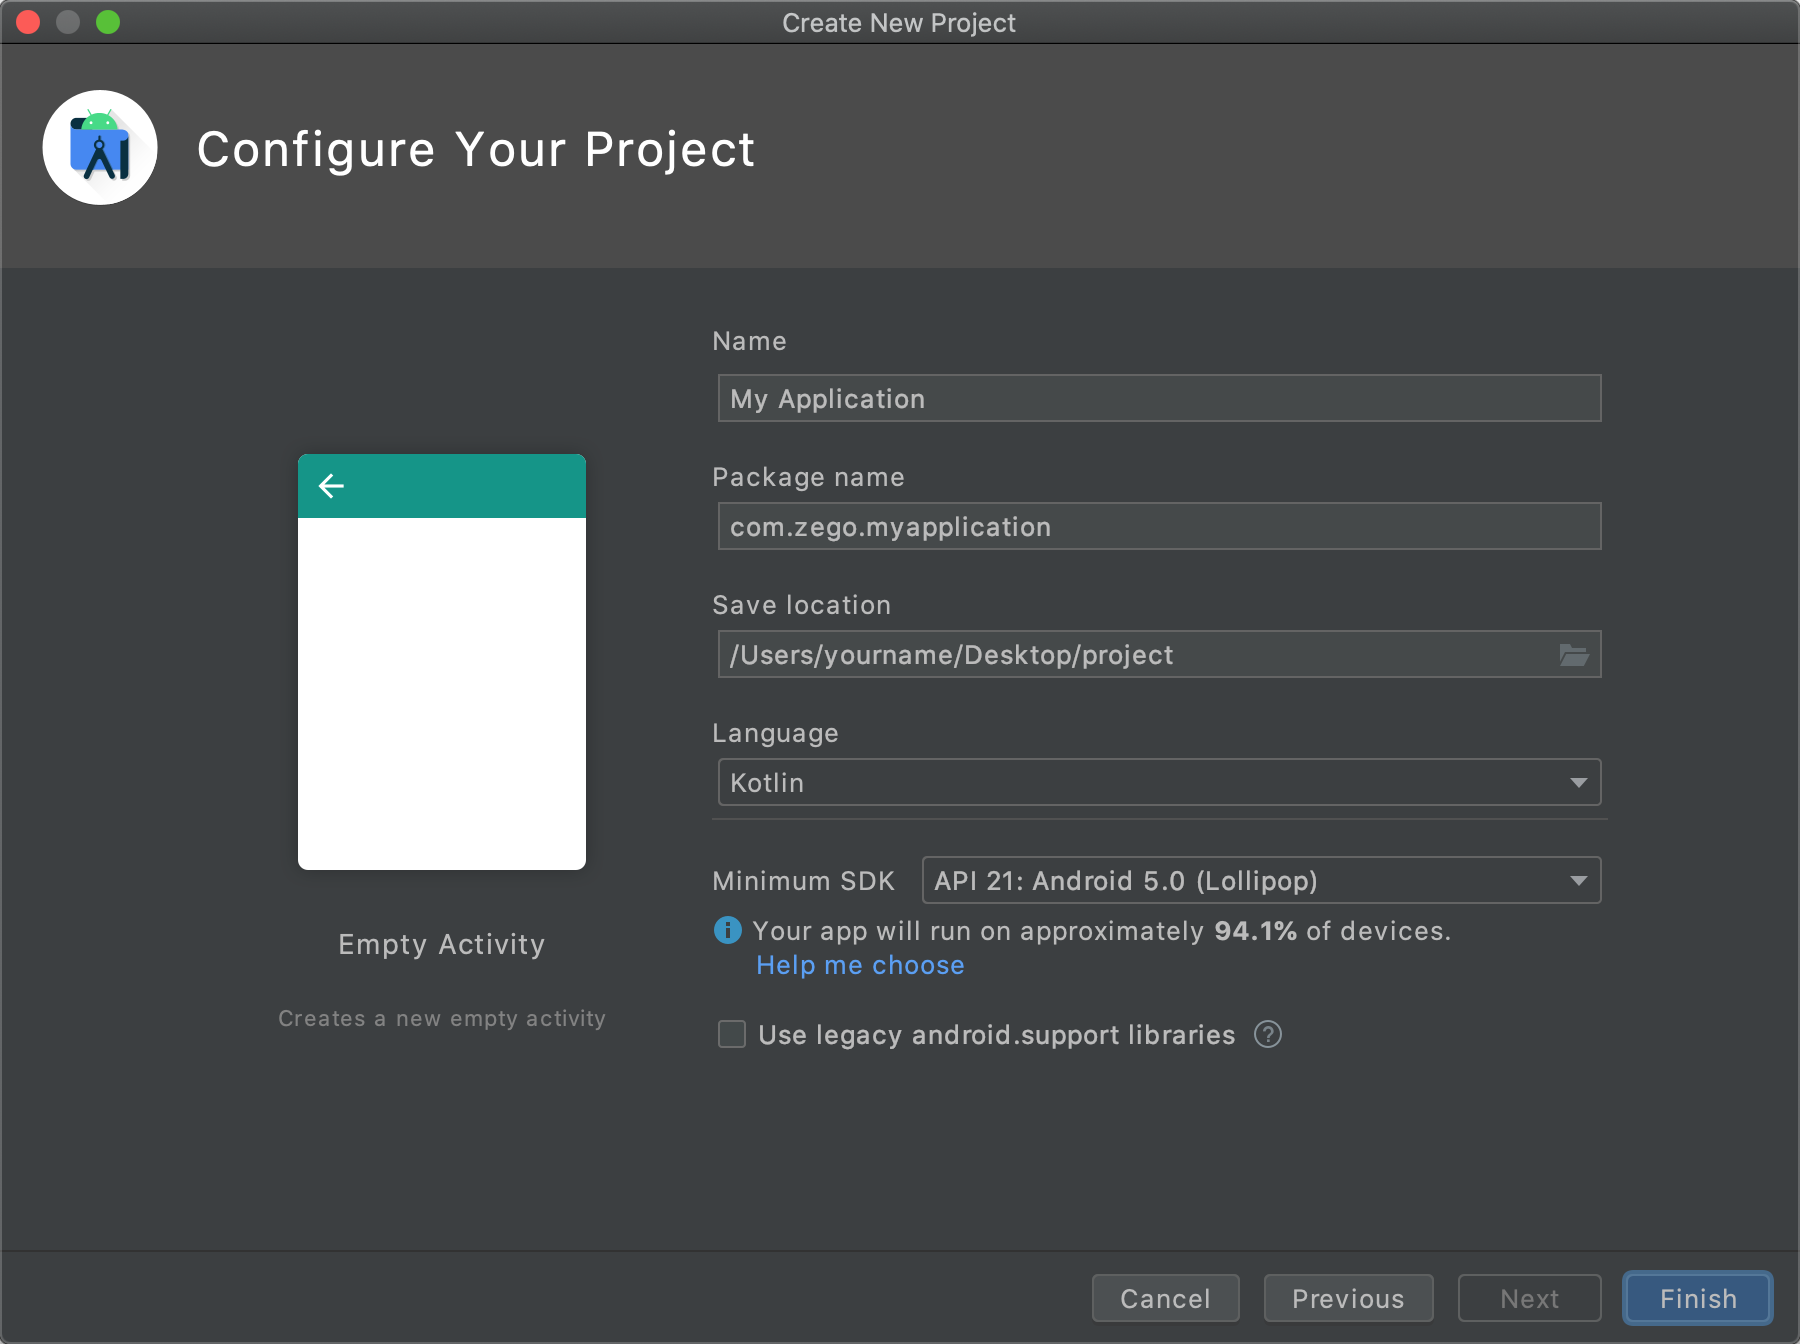)
Click Finish to end the project creation.
The ZegoSuperBoard SDK is built based on AndroidX. Therefore, the imported project also needs to be built based on AndroidX. If the project does not satisfy the preceding requirement, migrate the project with reference to Migrating to AndroidX.
Download and extract the latest version of SDK with reference to SDK downloads.
Copy zegoexpress.jar and the corresponding arm64-v8a/armeabi-v7a folder, zegowhiteboardview.aar, zegodocsview.aar, and zegosuperboard.aar files to the app/libs/ folder in the developer's project directory.
Add SDK reference, enter the app folder and open the build.gradle file.
ndk {
    abiFilters "armeabi-v7a", 'arm64-v8a'
}sourceSets {
main {
jniLibs.srcDirs = ['libs']
}
}In the app/build.gradle file, add the following code to the dependencies node:
implementation fileTree(include: ['*.jar', '*.aar'], dir: 'libs')The SDK depends on the following modules and add the following code to the dependencies node in the app/build.gradle file:
// To integrate the SDK in a common Java project, this dependency item needs to be added.
implementation "org.jetbrains.kotlin:kotlin-stdlib-jdk8:1.4.30" // The latest version during file compiling is 1.4.30.
In the sample code, the libs directory is used only for reference, which can be set as required.
Add the permission description, open the app/AndroidManifest.xml file, and add the following contents:
    <!-- Permissions mandatory for the SDK -->
    <uses-permission android:name="android.permission.ACCESS_WIFI_STATE" />
    <uses-permission android:name="android.permission.INTERNET" />
    <uses-permission android:name="android.permission.ACCESS_NETWORK_STATE" />
    <uses-permission android:name="android.permission.WRITE_EXTERNAL_STORAGE" />
    <uses-permission android:name="android.permission.READ_EXTERNAL_STORAGE" />
The permissions are described as follows:
| Permission | Mandatory or Not | Permission Description | Reason |
|---|---|---|---|
| INTERNET | Mandatory | Network access permission | SDK basic functions can be used only when the network connection is available. |
| ACCESS_WIFI_STATE | Mandatory | Permission to obtain the current Wi-Fi status | The SDK will perform various operations based on the network connection status. For example, when the network is reconnected, the SDK will restore all the states to those before the network disconnection, not requiring a user to perform any additional operations. |
| ACCESS_NETWORK_STATE | Mandatory | Permission to obtain the current network connection status | The SDK will perform various operations based on the network connection status. For example, when the network is reconnected, the SDK will restore all the states to those before the network disconnection, not requiring a user to perform any additional operations. |
| WRITE_EXTERNAL_STORAGE | Mandatory | Permission to write the built-in SD card | The SDK will save logs and related configuration files to the built-in SD card. |
| READ_EXTERNAL_STORAGE | Mandatory | Permission to read the built-in SD card | The SDK will save logs and related configuration files to the built-in SD card. |
In the proguard-rules.pro file, add the -keep class configuration for the SDK, which prevents obfuscation of the SDK public class names.
-keep class im.zego.zegowhiteboard.**{*;}
-keep class im.zego.zegodocs.**{*;}
-keep class im.zego.superboard.**{*;}To create a singleton instance of the ZegoExpressEngine class, call the createEngine method with the AppID of your project.
To receive callbacks, implement an event handler object that conforms to the IZegoEventHandler protocol, and then pass the implemented event handler object to the createEngine method as the eventHandler parameter.
Alternatively, you can pass null to the createEngine method as the eventHandler parameter for now, and then call the method setEventHandler to set up the event handler after creating the engine.
//  Create a ZegoExpressEngine instance and set eventHandler to [self].
// If eventHandler is set to [null], no callback will be received. You can set up the event handler later by calling the [setEventHandler:] method.
ZegoEngineProfile profile = new ZegoEngineProfile();
profile.appID = ;  // The AppID you get from ZEGOCLLOUD Admin Console. AppID format: 123456789L
profile.appSign = ;  // The AppSign you get from ZEGOCLOUD Admin Console. AppSign format: @"0123456789012345678901234567890123456789012345678901234567890123" (64 characters)
profile.scenario = ZegoScenario.GENERAL;  // Use general scenario.
profile.application = getApplication();
engine = ZegoExpressEngine.createEngine(profile, null);
To change the authentication mode, refer to Upgrade the authentication mode from using the AppSign to Token.
Use the init method in ZegoSuperBoardManager to initialize the ZegoSuperBoard SDK.
If errorCode in the callback onInit is ZegoSuperBoardError.ZegoSuperBoardSuccess, initialization is successful and more operations can be performed. For details about errorCode, refer to Common Error Codes.
// Configure appId and corresponding appSign (contact us to get the appsign), and UserID required for superBoard initialization.
ZegoSuperBoardInitConfig config = new ZegoSuperBoardInitConfig();
config.appID = appID; // Fill in the appID.
config.appSign = appSign; // Fill in the appSign.
config.userID = userID; // Fill in the userID.

// Call the [SuperBoardManager] to initialize the SuperBoard SDK.
// this is the Application context in Android. Therefore, this segment of code needs to be implemented in the Application.
ZegoSuperBoardManager.getInstance().init(this, config, new IZegoSuperBoardInitCallback() {
    @Override
    public void onInit(int errorCode) {
        Log.d(TAG, "init ZegoSuperBoardManager result: errorCode = [" + errorCode + "]");
        if (errorCode == ZegoSuperBoardError.ZegoSuperBoardSuccess) {
            /** Initialization succeeded. */
        } else {
            /** Initialization failed. */
        }
    }
});
You can call subsequent API methods only after ensuring that both the ZegoExpress-Video SDK and ZegoSuperBoard SDK are initialized successfully, that is, the respective init() methods are called and errorCode returned in the callback is ZegoSuperBoardError.ZegoSuperBoardSuccess.
Based on the actual application needs, you can listen for the concerned event callbacks after the SuperBoard is initialized. The callbacks include error reminders, adding whiteboard files remotely, deleting whiteboard files remotely, and switching whiteboard files remotely.
The SuperBoard automatically realizes the multi-terminal synchronization capability, and only needs to refresh the local UI logic in the remote notification callback.
onError: Error code thrown by the SDK. For details about errorCode, refer to Common Error Codes.onRemoteSuperBoardSubViewAdded: Notification for remotely adding a whiteboard.onRemoteSuperBoardSubViewRemoved: Notification for remotely destroying a whiteboard.onRemoteSuperBoardSubViewSwitched: Notification for remotely switching a whiteboard.// Common SuperBoard-related callbacks.
// The SuperBoard automatically realizes the multi-terminal synchronization capability, and only needs to refresh the local UI logic in the remote notification callback.
ZegoSuperBoardManager.getInstance().setManagerListener(new IZegoSuperBoardManagerListener() {
@Override
public void onError(int errorCode) {
// Error code thrown by the SDK. You can remind users of some abnormalities based on the error codes.
}
@Override
public void onRemoteSuperBoardSubViewAdded(@NonNull ZegoSuperBoardSubViewModel subViewModel) {
// Notification for remotely adding a whiteboard. Update the displayed UI content based on the information in the model, such as the whiteboard name.
}
@Override
public void onRemoteSuperBoardSubViewRemoved(@NonNull ZegoSuperBoardSubViewModel subViewModel) {
// Notification for remotely deleting a whiteboard
// After receiving a notification, update the UI content based on the current ZegoSuperBoardManager.getInstance().getSuperBoardView().getCurrentSuperBoardSubView(), for example, update the whiteboard name that is currently displayed.
}
@Override
public void onRemoteSuperBoardSubViewSwitched(@NonNull String uniqueID) {
// Notification for remotely switching a whiteboard
// After receiving a notification, update the UI content based on the current ZegoSuperBoardManager.getInstance().getSuperBoardView().getCurrentSuperBoardSubView(), for example, update the whiteboard name that is currently displayed.
}
});You can call subsequent APIs only after ensuring that loginRoom() if the ZegoExpress-Video SDK is successfully called.
To log in to a room, call the loginRoom method. If the roomID does not exist, a new room will be created and you will log in automatically when you call the loginRoom method.
/** create a user */
ZegoUser user = new ZegoUser("user1");


ZegoRoomConfig roomConfig = new ZegoRoomConfig();
/** Token is generated by the user's own server. For an easier and convenient debugging, you can get a temporary token from the ZEGOCLOUD Admin Console */
roomConfig.token = "xxxx";
/** onRoomUserUpdate callback can be received only by passing in a ZegoRoomConfig whose "isUserStatusNotify" parameter value is "true".*/
roomConfig.isUserStatusNotify = true;

/** log in to a room */
engine.loginRoom("room1", user, roomConfig, (int error, JSONObject extendedData)->{
    // (Optional callback) The result of logging in to the room. If you only pay attention to the login result, you can use this callback.
});
// Log in to a room.
void loginRoom() {
// The ZegoUser constructor public ZegoUser(String userID) sets "userName" to the same as the passed parameter "userID". userID and userName cannot be null; otherwise, the login to the room will fail.
ZegoUser user = new ZegoUser("user2");
ZegoRoomConfig roomConfig = new ZegoRoomConfig();
// onRoomUserUpdate callback can be received only by passing in a ZegoRoomConfig whose "isUserStatusNotify" parameter value is "true".
roomConfig.isUserStatusNotify = true;
// The roomID must be generated by you and needs to be globally unique. Users need to use the same roomID to join the same room to talk.
String roomID = "room1";
// Log in to a room.
engine.loginRoom(roomID, user, roomConfig, (int error, JSONObject extendedData)->{
// The result of logging in to the room. If you only pay attention to the login result, you can use this callback.
if (error == 0) {
// Login successful.
Toast.makeText(this, "Login successful.", Toast.LENGTH_LONG).show();
} else {
// Login failed. For more details, see the doc [Error codes].
Toast.makeText(this, "Login failed. For more details, see the doc [Error codes].", Toast.LENGTH_LONG).show();
}
});
}For determining a successful login to a room, the onRoomStateUpdate callback needs to be listened for. If ZegoRoomState is ZegoRoomState.CONNECTED, the login to a room is successful. Subsequent APIs can be called only when the login is successful.
// Ensure that the login to a room is successful before creating a whiteboard, that is, ensure that the room callback state is ZegoRoomState.CONNECTED.
engine.setEventHandler(new IZegoEventHandler() {
    /** The following are common room-related callbacks: */

    /** Room status update callback */
    @Override
    public void onRoomStateUpdate(String roomID, ZegoRoomState state, int errorCode, JSONObject extendedData) {
        /** Implement event callbacks as required */
        if (state == ZegoRoomState.CONNECTED) {
            // Login to a room is successful. You can create a whiteboard only after the login is successful.
            // You can store the code for creating a whiteboard here to ensure that the whiteboard is created only after the login to the room is successful. Alternatively, you can also use other methods to ensure that a whiteboard is created only after the login is successful.
        }
    }
});Listen for the callback that triggers when a Token expires, and renew the Token when it has expired.
engine.setEventHandler(new IZegoEventHandler() {
    @Override
    public void onRoomTokenWillExpire(String roomID, int remainTimeInSecond) {
        // When the Token is about to expire, generate a new one on your app server.
        String token = getTokenFromServer();
        engine.renewToken(roomID, token);
        // Update the Token here too.
        ZegoSuperBoardManager.getInstance().renewToken(token);
    }
}After logging in to a room, directly add ZegoSuperBoardView to your business scenario view. The example code is as follows:
ZegoSuperBoardView superBoardView = ZegoSuperBoardManager.getInstance().getSuperBoardView();
if (superBoardView != null) {
    // Add ZegoSuperBoardView to the specified view (the boardContainer view in the Demo is used as an example).
    boardContainer.addView(superBoardView, new FrameLayout.LayoutParams(
            FrameLayout.LayoutParams.MATCH_PARENT,
            FrameLayout.LayoutParams.MATCH_PARENT,
            Gravity.CENTER));
}A Super Board can be used to create a common whiteboard.
Before creating a whiteboard, ensure that the login is successful. You are advised to call the API for creating a common whiteboard in the callback for successful login.
// Ensure that the login to a room is successful before creating a whiteboard, that is, ensure that the room callback state is ZegoRoomState.CONNECTED.
engine.setEventHandler(new IZegoEventHandler() {
    /** The following are common room-related callbacks: */

    /** Room status update callback */
    @Override
    public void onRoomStateUpdate(String roomID, ZegoRoomState state, int errorCode, JSONObject extendedData) {
        /** Implement event callbacks as required */
        if (state == ZegoRoomState.CONNECTED) {
            // Login to a room is successful. You can create a whiteboard only after the login is successful.
            // You can store the code for creating a common whiteboard here to ensure that the whiteboard is created only after the login to the room is successful. Alternatively, you can also use other methods to ensure that a whiteboard is created only after the login is successful.
        }
    }
});// To create a whiteboard, you need to construct the ZegoCreateWhiteboardConfig configuration class. The field descriptions are as follows:
ZegoCreateWhiteboardConfig config = new ZegoCreateWhiteboardConfig();
// Whiteboard name
config.name = "one test whiteboard";
// Page count of a whiteboard
config.pageCount = 5;
// Width of one page of whiteboard
config.perPageWidth = 960;
// Height of one page of whiteboard
config.perPageHeight = 540;
ZegoSuperBoardManager.getInstance().createWhiteboardView(config, new IZegoSuperBoardCreateCallback() {
@Override
public void onViewCreated(int errorCode, @Nullable ZegoSuperBoardSubViewModel subViewModel) {
Log.d(TAG, "createWhiteboardView() called with: errorCode = [" + errorCode + "], subViewModel = [" + subViewModel + "]");
if (errorCode == ZegoSuperBoardError.ZegoSuperBoardSuccess) {
/** Creation succeeded. */
} else {
/** Creation failed. */
}
}
});querySuperBoardSubViewList method to obtain the current number of whiteboards in a room.Use multiple devices to run the preceding project and log in to the same room ID. Press and move with your finger within the range of ZegoSuperBoardView on any device. Then the graffiti effect is displayed on ZegoSuperBoardView of the device.
// After a whiteboard is destroyed, the SDK will automatically switch to another whiteboard. The displayed whiteboard is the previous one of the destroyed whiteboard.

// subViewModel is a model in the whiteboard sharing list ZegoSuperBoardManager.getInstance().getSuperBoardSubViewModelList().
ZegoSuperBoardManager.getInstance().destroySuperBoardSubView(uniqueId, new IZegoSuperBoardDestroyCallback() {
    @Override
    public void onViewDestroyed(int errorCode) {
        Log.d(TAG, "onViewDestroyed() called with: errorCode = [" + errorCode + "]");
        if (errorCode == ZegoSuperBoardError.ZegoSuperBoardSuccess) {
            /** Destroyed */
        } else {
            /** Destruction failed. */
        }
    }
});Call the logoutRoom interface of ZegoExpressEngine to leave the room.
engine.logoutRoom(roomID);Call the unInit method of ZegoSuperBoardManager to deinitialize the ZegoSuperBoard SDK.
// It is recommended to deinitialize the ZegoSuperBoard SDK when leaving the room
ZegoSuperBoardManager.getInstance().unInit();If you no longer need the capabilities of the ZEGO Express Video SDK, you can call the destroyEngine method of ZegoExpressEngine to destroy the engine and release resources such as microphone, camera, memory, CPU, etc.
ZegoExpressEngine.destroyEngine(null);
